
WORKSTATION CLIENT UPDATER
Note: It is essential that this installation be performed by a user with full administrator rights to the local machine.
If the Macola client is not installed you will be prompted with a message explaining the client is not installed. You will be given a choice to continue or cancel.
Obtaining and Installing the Workstation Client Updater
The WiSys Client Updater can be downloaded from the WiSys website at http://www.wisys.com/support/wisys-client-updater-install/
Note: this guide was created using a Microsoft Windows 10 OS and the Microsoft Edge browser. Depending on your operating system and browser, you may see slight variations to the screenshots below.
Figure 1: WiSys Client Updater Install from the website
Click the WiSys Client Updater Install file. You can start the installation immediately or save the download to your computer for installation at a later time.
To save the download to install later, click "Save as".
Figure 2: Saving the download

Select the location where you would like to save the download and click "Save".
Figure 3: Saving the download location

Figure 4: Downloading the updater

When the download is complete, you will see the screen shown in Figure 5.
Choosing "Open Folder” will take you to your desktop folder where the executable file has been saved. Double click the icon to launch the executable file.
Figure 5: Download Complete

An installation icon will now appear where you saved the download. When you are ready to download, double click the icon, and install following the Install Immediately direction below.
Note: If the WiSys Product Updater was run on the server where terminal or remote desktop services is installed, it is not necessary to run the client updater on that server. If the Product Updater was run on the SQL server, it IS necessary to run the Client Updater on the server where terminal or remote desktop services is installed.
When installing on a terminal server, you must first put the Terminal Services server in Install Mode.
1. Click Start, and then click Run.
2. In the Open box, type cmd, and then click OK.
3. At the command prompt, type change user /install, and then press ENTER. The following message appears:
User session is ready to install applications.
4. Type exit, and then press ENTER.
5. Add or remove the programs that you want.
When the installation is complete, return Terminal Services to Execute mode.
1. Click Start, and then click Run.
2. In the Open box, type cmd, and then click OK.
3. At the command prompt, type change user /execute, and then press ENTER. The following message appears:
User session is ready to execute applications.
4. Type exit, and then press ENTER.
Figure 6: Installation icon

TO INSTALL IMMEDIATELY, click "Run".
Figure 7: Click Run

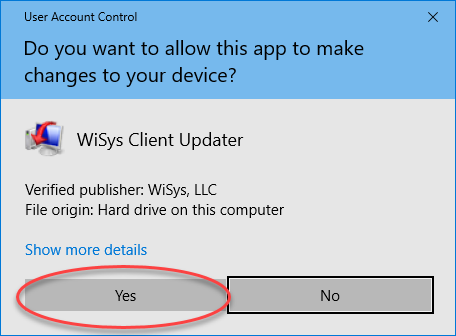
If you receive a User Account Control Warning, Click “Yes”.
Figure 8: Click Yes
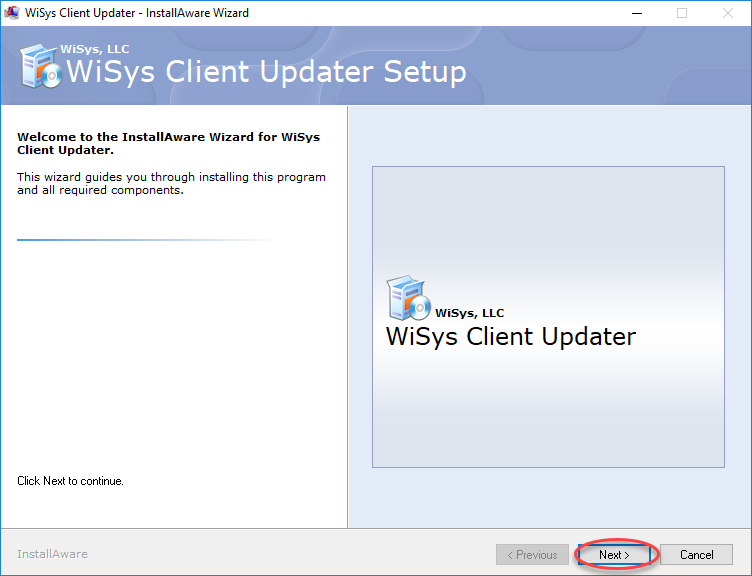
A WiSys Client Updater Install Wizard will appear. Click "Next".
Figure 9: Install Wizard
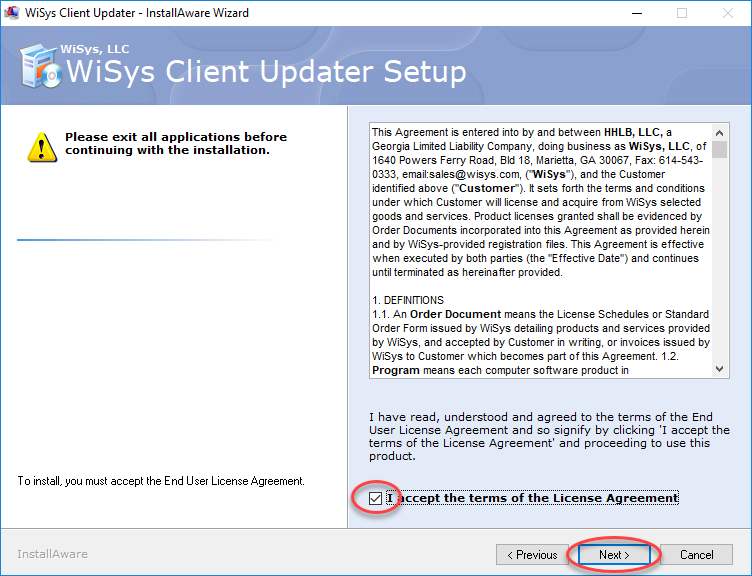
Check the box to accept the end user license agreement and click "Next”.
Figure 10: Accepting License Agreement
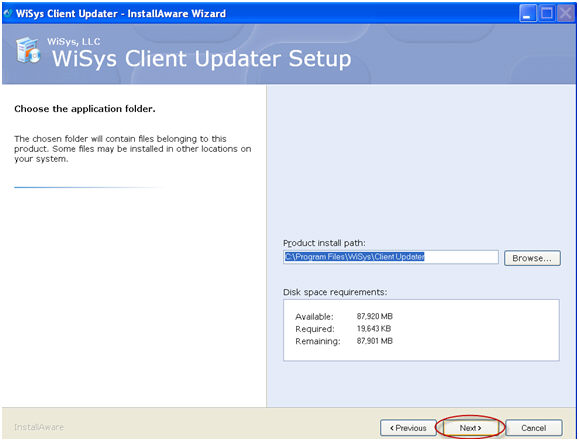
The Installer will ask where to install the file. Choose the default at C:\Program Files (x86)\WiSys\Client Updater. Click "Next".
Figure 11: Select Installation Path
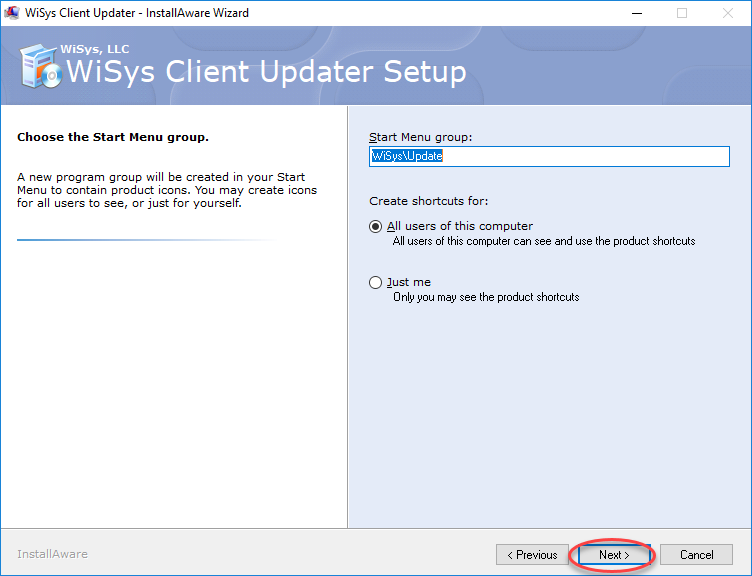
The next screen allows you to choose the Start Menu group. Click the radio button to choose to create a shortcut for all users of this computer or just the current user. Click "Next”.
Figure 12: Start Menu group
When the Updater is ready to update you system, the next screen is displayed. Click “Next”.
Figure 13: Ready to update your system
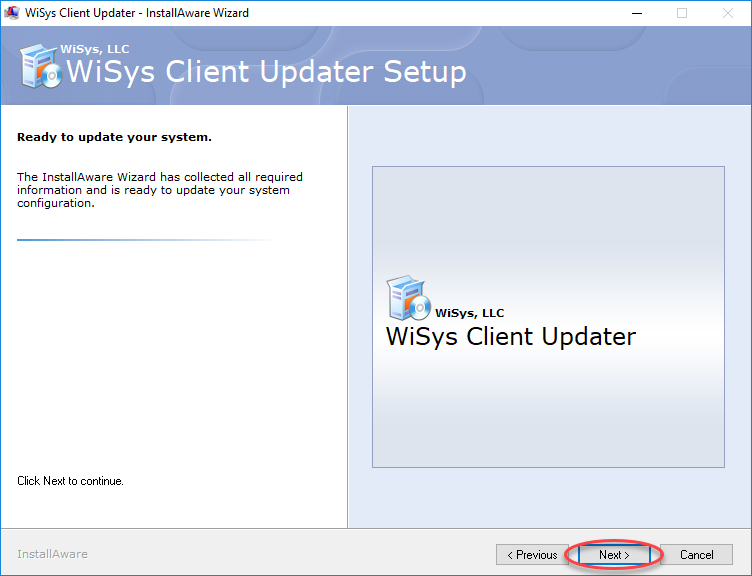
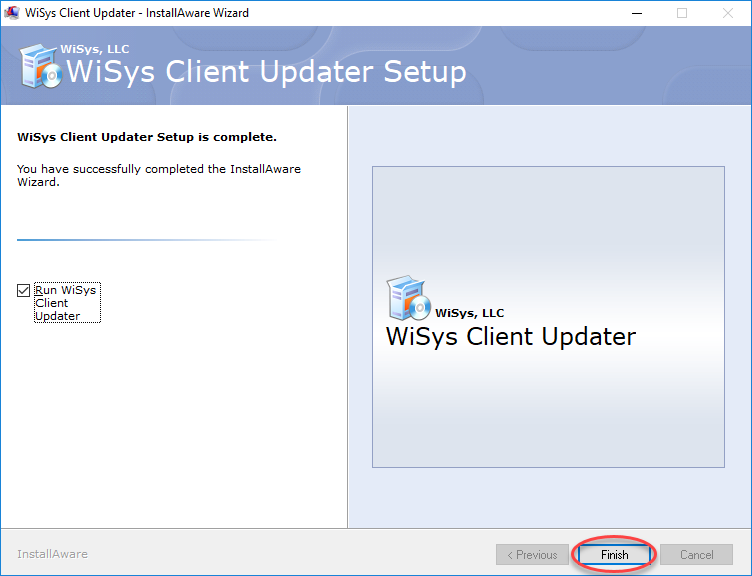
Figure 14: Confirming the installation
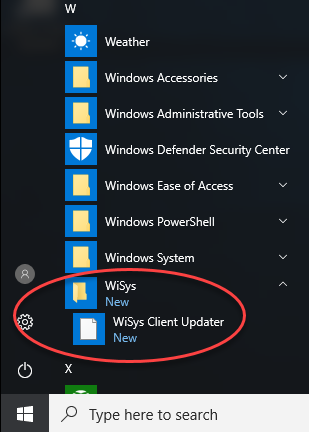
Running the Workstation Client Updater
After installing the Client Updater, you can launch the updater by clicking
Start | WiSys | WiSys Client Updater
Figure 15: Launching the updater
You can also launch the updater by clicking on the desktop icon.
Figure 16: WiSys Client Updater Icon

If you are asked to allow this app to make changes to your device, click “Yes”.
Figure 17: User Account Control Acceptance

The first screen will ask for your SQL server. Select the server and click "OK".
Figure 18: SQL server
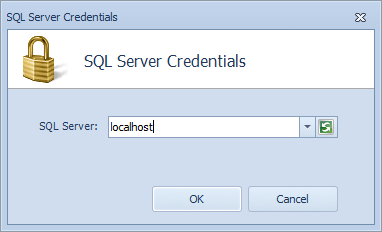
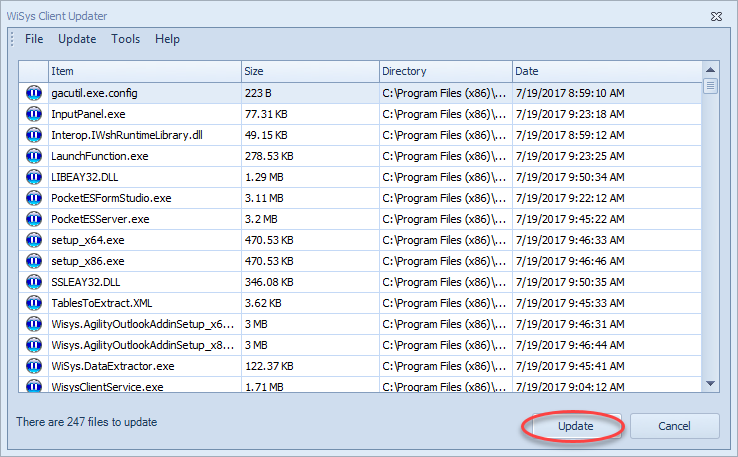
Figure 19: Files to update
Some files in the update may be runtime files which need to be updated. Click "OK” to update these files.
Figure 20: Runtime files message
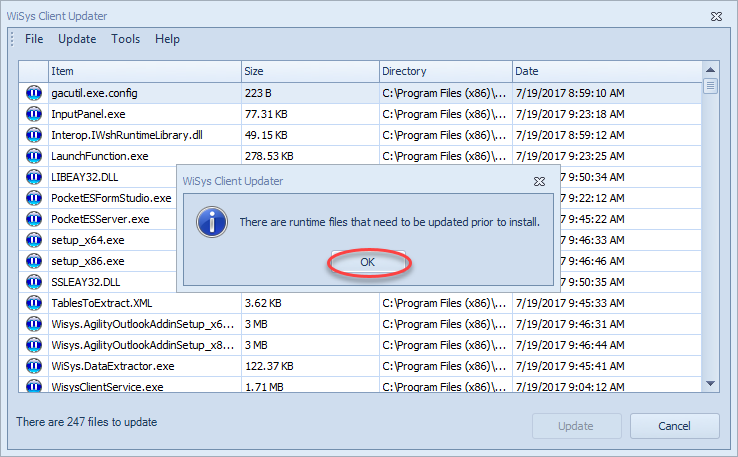
Figure 21: The CRRuntime install begins
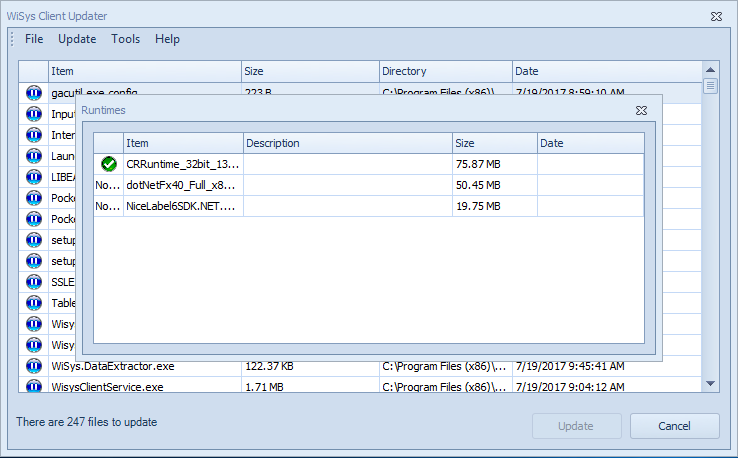
The Crystal Runtime files may take several minutes to install. You will see several screens throughout this process.
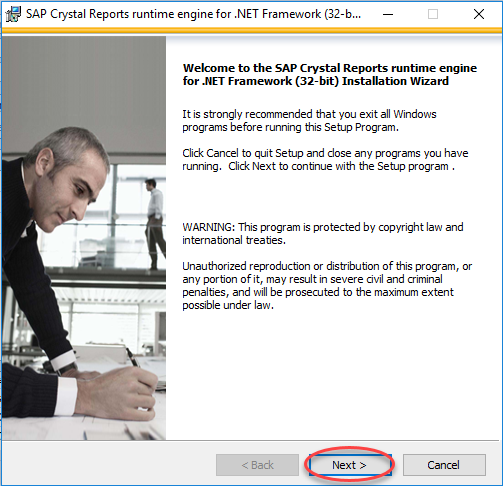
Figure 22: Crystal Reports Wizard
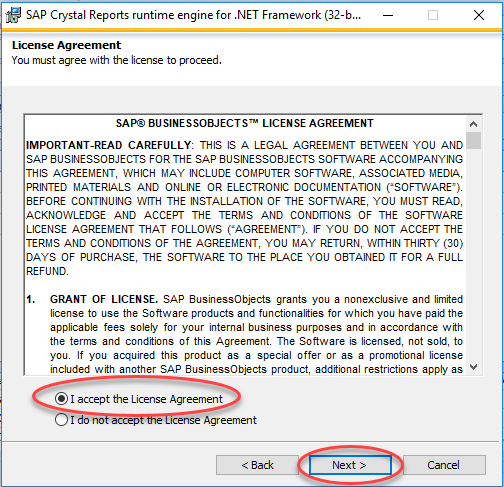
License Agreement. Check the “I accept the license agreement” radio button and click “Next”.
Figure 23: License Agreement
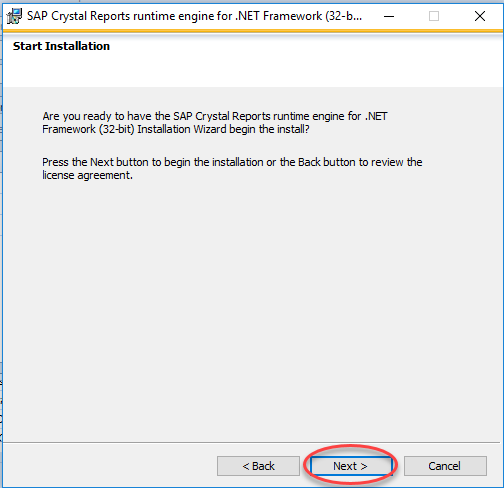
Click “Next” to begin the installation.
Figure 24: Begin the Installation
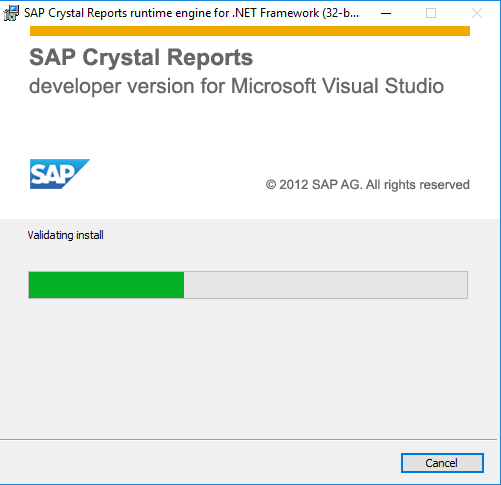
The Installation will begin
Figure 25: Installation Progress
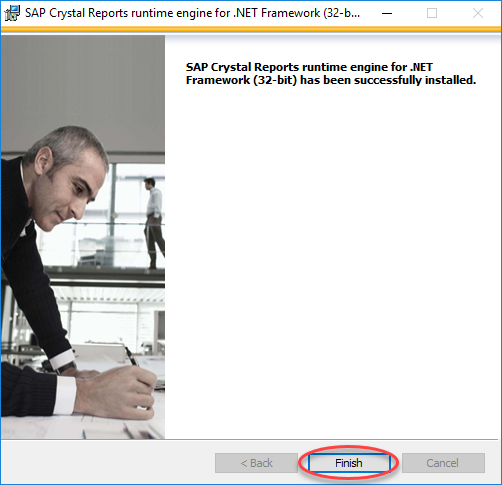
Click "Finish” when the Crystal Reports Runtime is completed.
Figure 26: Crystal Reports Runtime completed
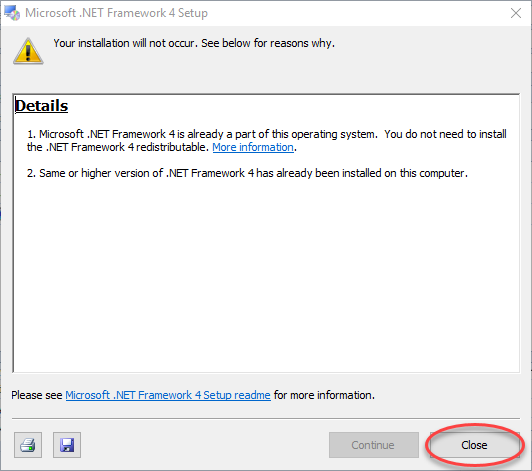
The Microsoft .Net Framework 4 Setup will begin. In many instances this is already installed on the workstation. If this is the case you will be notified that it already part of the OS and you can close the setup window.
Figure 27: Microsoft .NET Framework 4 Setup
The NiceLabel Runtime Installation will begin.
Figure 28: NiceLabel Install Wizard Begins

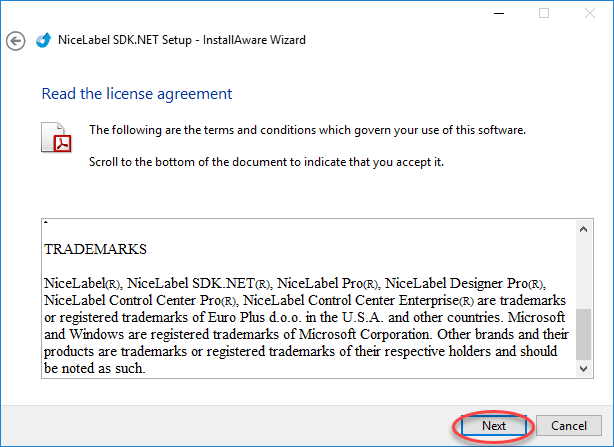
The NiceLabel SDK.NET Setup – InstallAware Wizard will begin. Click “Next”.
Figure 29: NiceLabel SDK.NET Setup – InstallAware Wizard begins

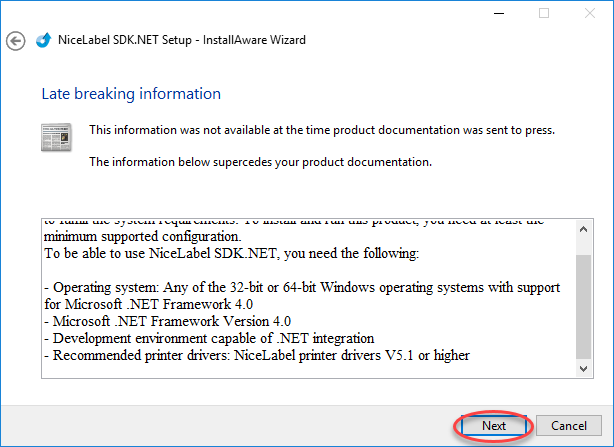
Then NiceLabel License Agreement will display, scroll to the bottom of the text box and click “Next”.
Figures 30 and 31: NiceLabel License Agreement
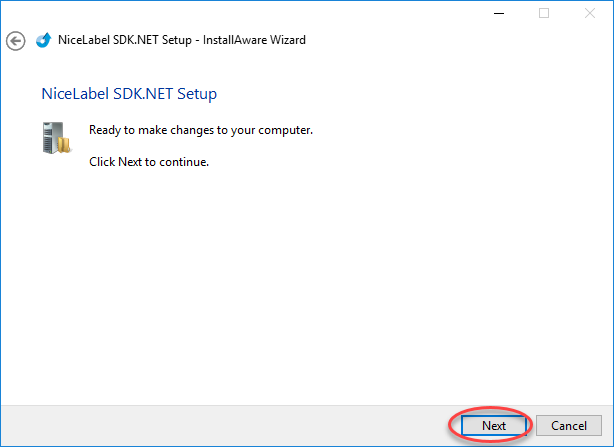
NiceLabel SDK.NET is now ready to install. Click “Next”.
Figure 32: NiceLabel SDK.NET Setup is ready
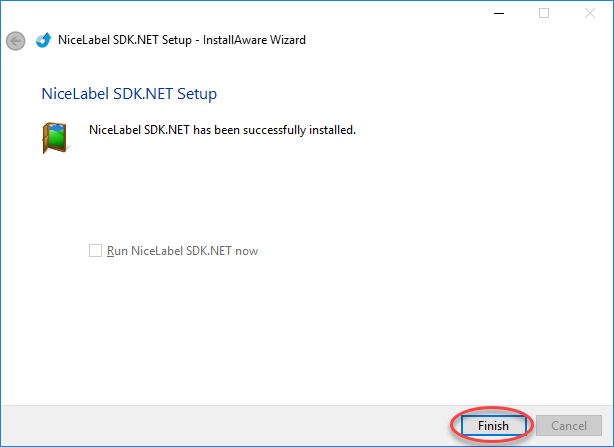
Installation completes. Click “Finish”.
Figure 33: NiceLabel SDK.NET Successful Install
Upon completion of Runtime Installation, the WiSys files begin to install
Figure 34: Completing installation of files

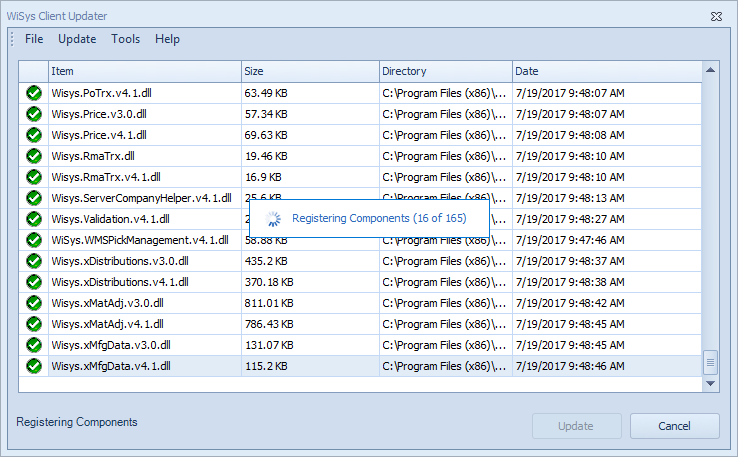
Upon completion of file installation, components will begin to register.
Figure 35: Registering Components
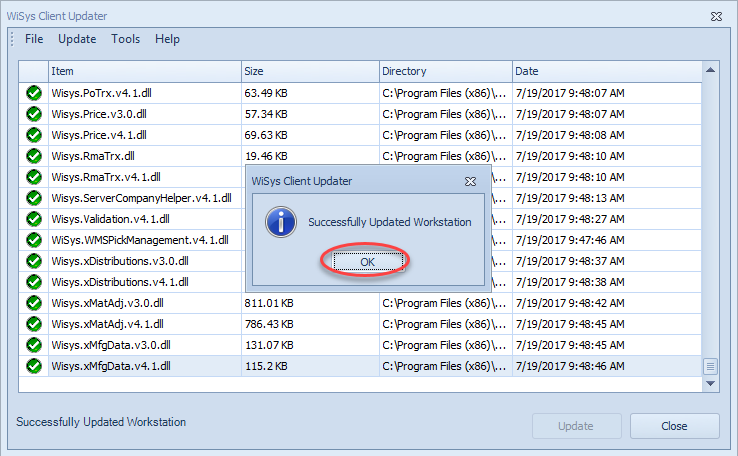
A message will appear when the workstation is successfully updated. Click "OK” to complete.
Figure 36: Successful update
Reboot the client PC following the successful update message.
In order for an end user to be able to successfully run Agility after the WiSys client has been installed, the following items need to be done by a user with Agility Administrator rights:
- Add the user’s Active Directory user name and assign them rights to Agility functions.
- Run Agility and add the companies (Macola databases) on that client the end user should have access to.
- Configure desktop printers for Agility applications the user will be printing.