AGILITY OPTIONS-DOCUMENTS
Document Management is where forms for printing are connected to various functions within WiSys. These forms include, but are not limited to:
Pick Tickets
Bills Of Lading
Packing Lists
Inventory Labels
Carton Labels, etc.
WiSys provides a set of documents written in Crystal reports for many of the more commonly used functions. By default, no documents are loaded into the system. The WiSys standard documents are loaded using the File ->Options->Documents -> Document Import process in Agility. This is usually done during a customer’s initial implementation after Agility has been installed and users have been created. (The standard documents are loaded initially by the consultant from WiSys or the Macola reseller).
Customers that develop their own forms and labels, will need to know how to attach those forms to the appropriate document type within Agility Document Management. That process is outlined below.
All documents which are created in Crystal Reports, Nice label, and .pdf files are added to the system under Agility Options-Documents. This option can only be performed by users with Agility Administrator rights on any workstation.
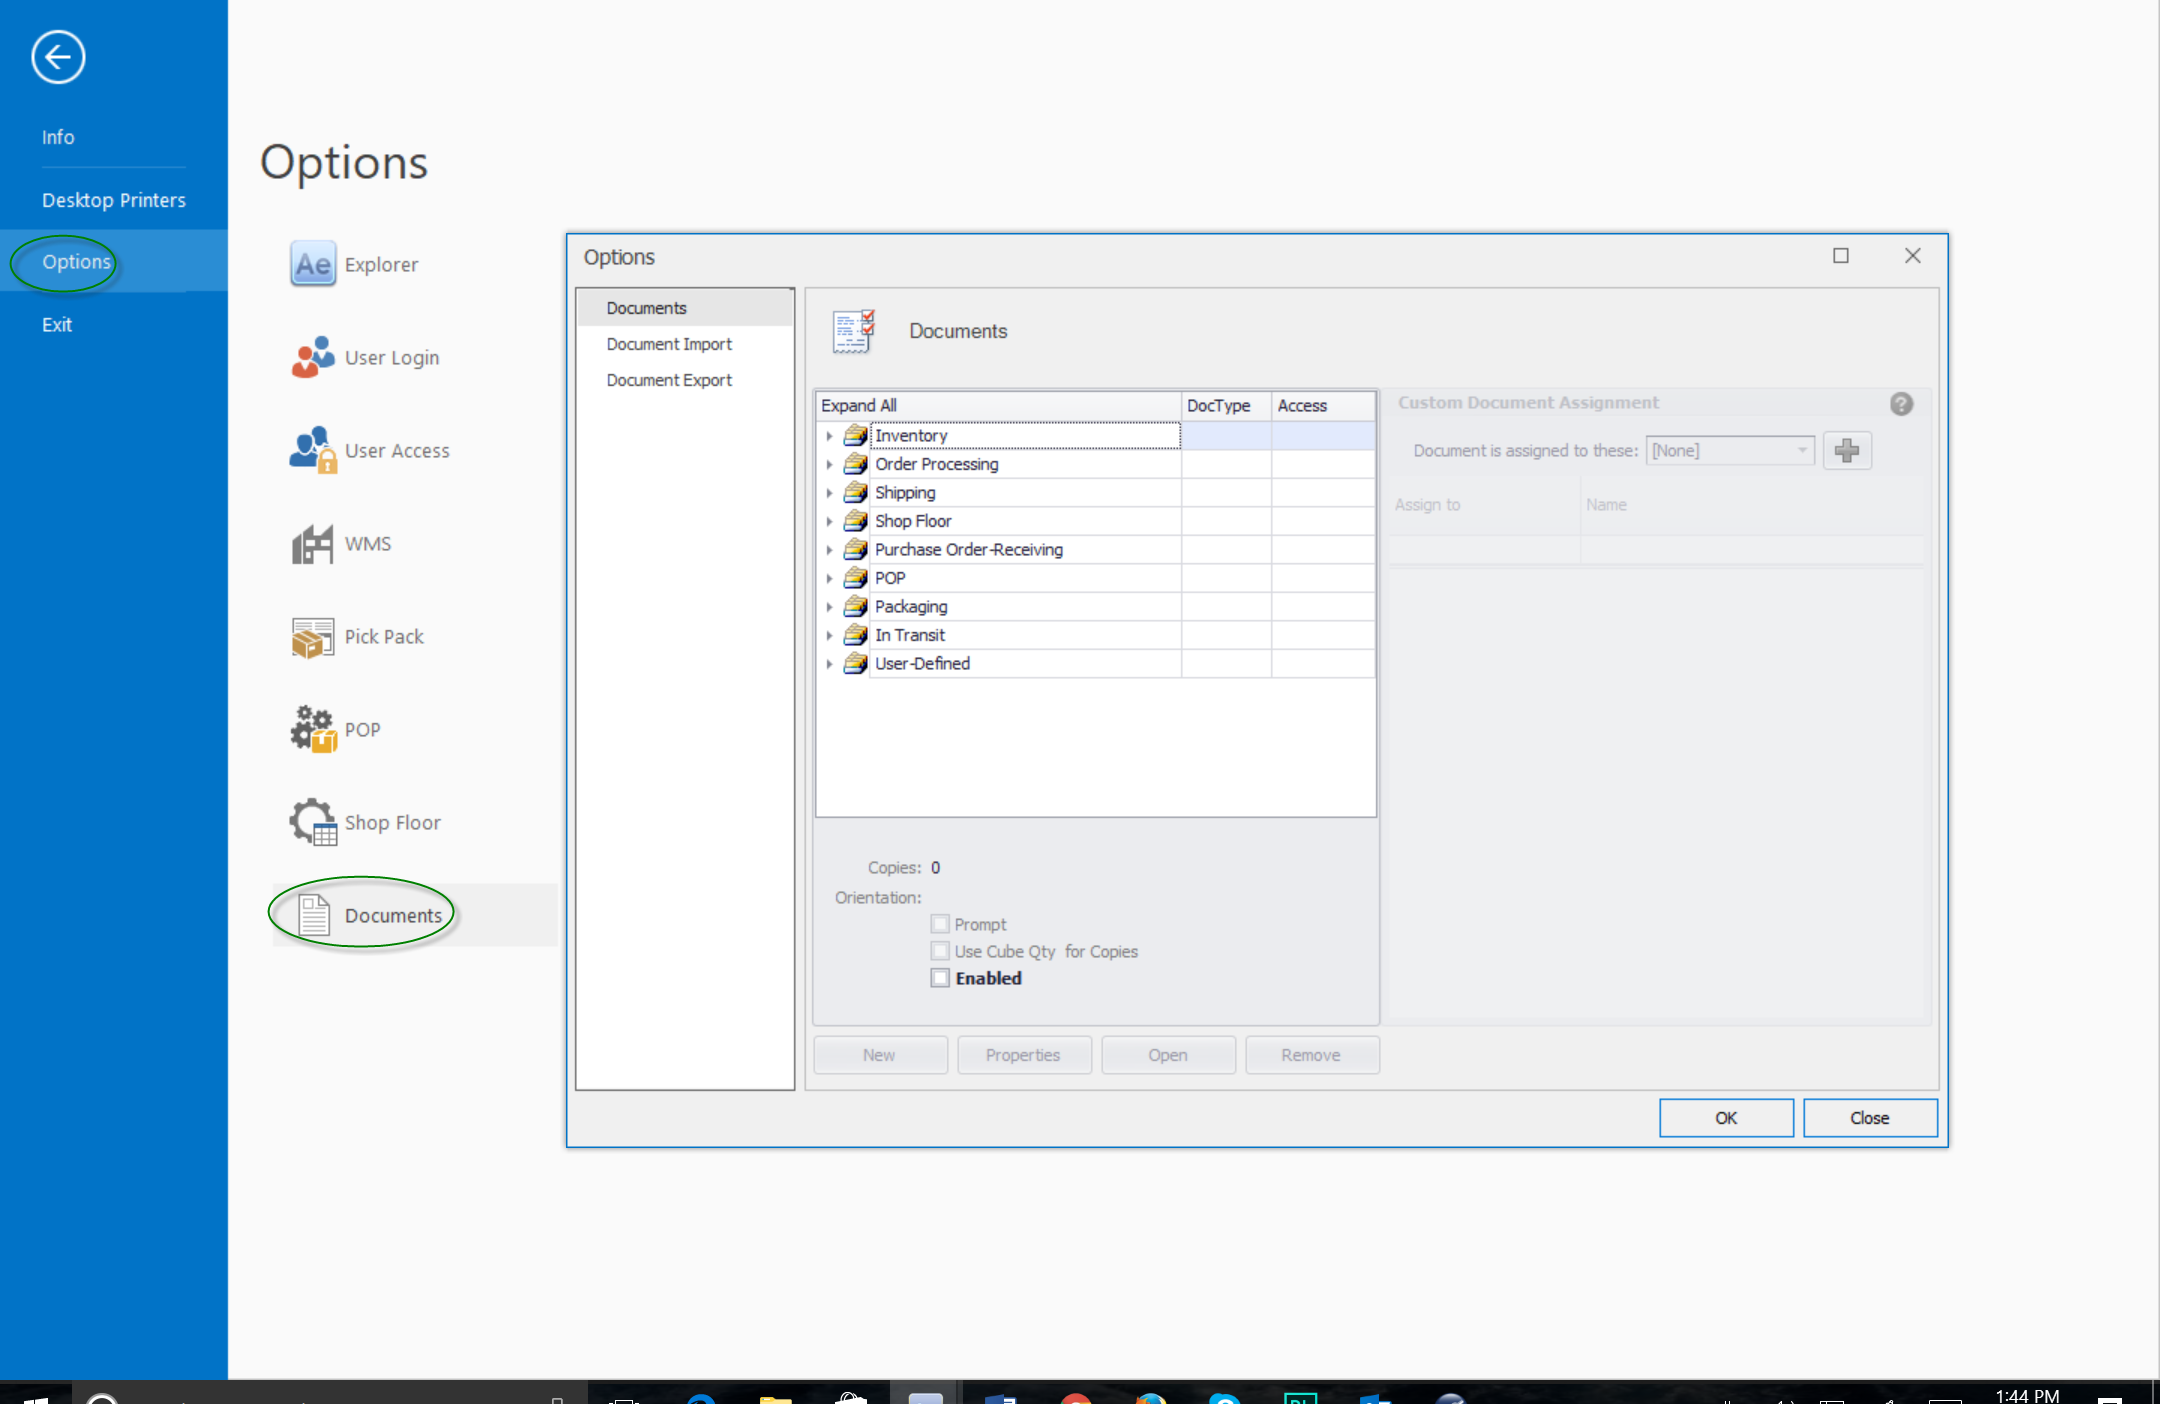
To navigate to the Documents Option in Agility select File, then Options and Documents.
Figure 1: Locating Agility Options Documents
Importing Documents
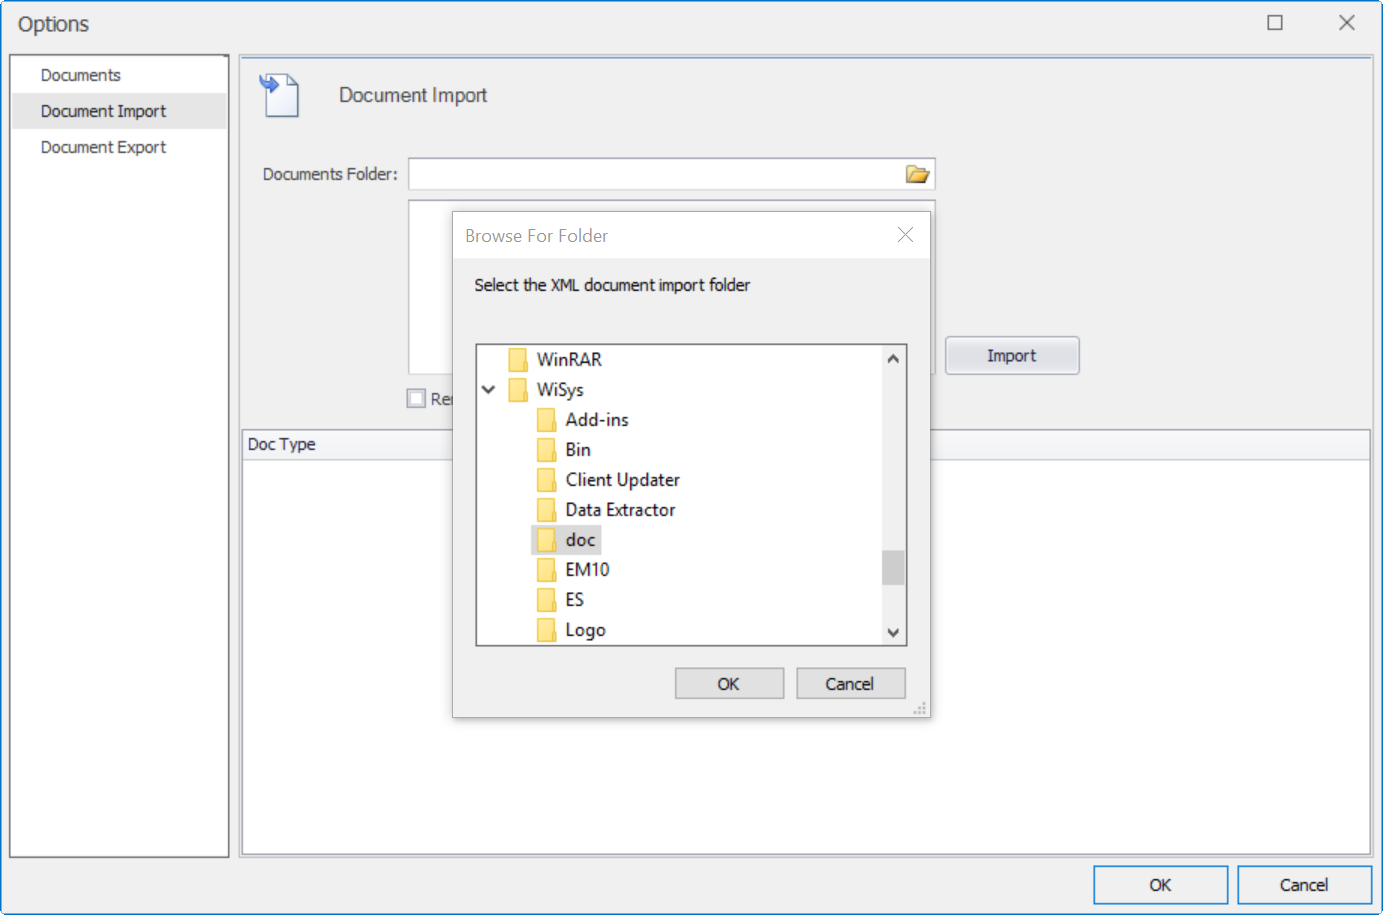
To load the default documents click the”Document Import” menu choice. In the field labeled "Documents Folder" click on the file folder and navigate to WiSys\Doc \and click "OK". A listing of all the .xml file for the products you have purchased will appear. Check the boxes for the packages you want to import and a listing of the documents will populate in the lower pane. Click "Import” to import all the documents. If you want to remove the current documents before importing, check the box labeled “Remove all current documents before importing”.
WARNING: This is not recommended for most sites as it will remove custom documents as well as the standard WiSys documents.
Figure 2: Importing Default Documents
A message will appear when the documents have successfully imported.
Figure 3: Successfully imported documents
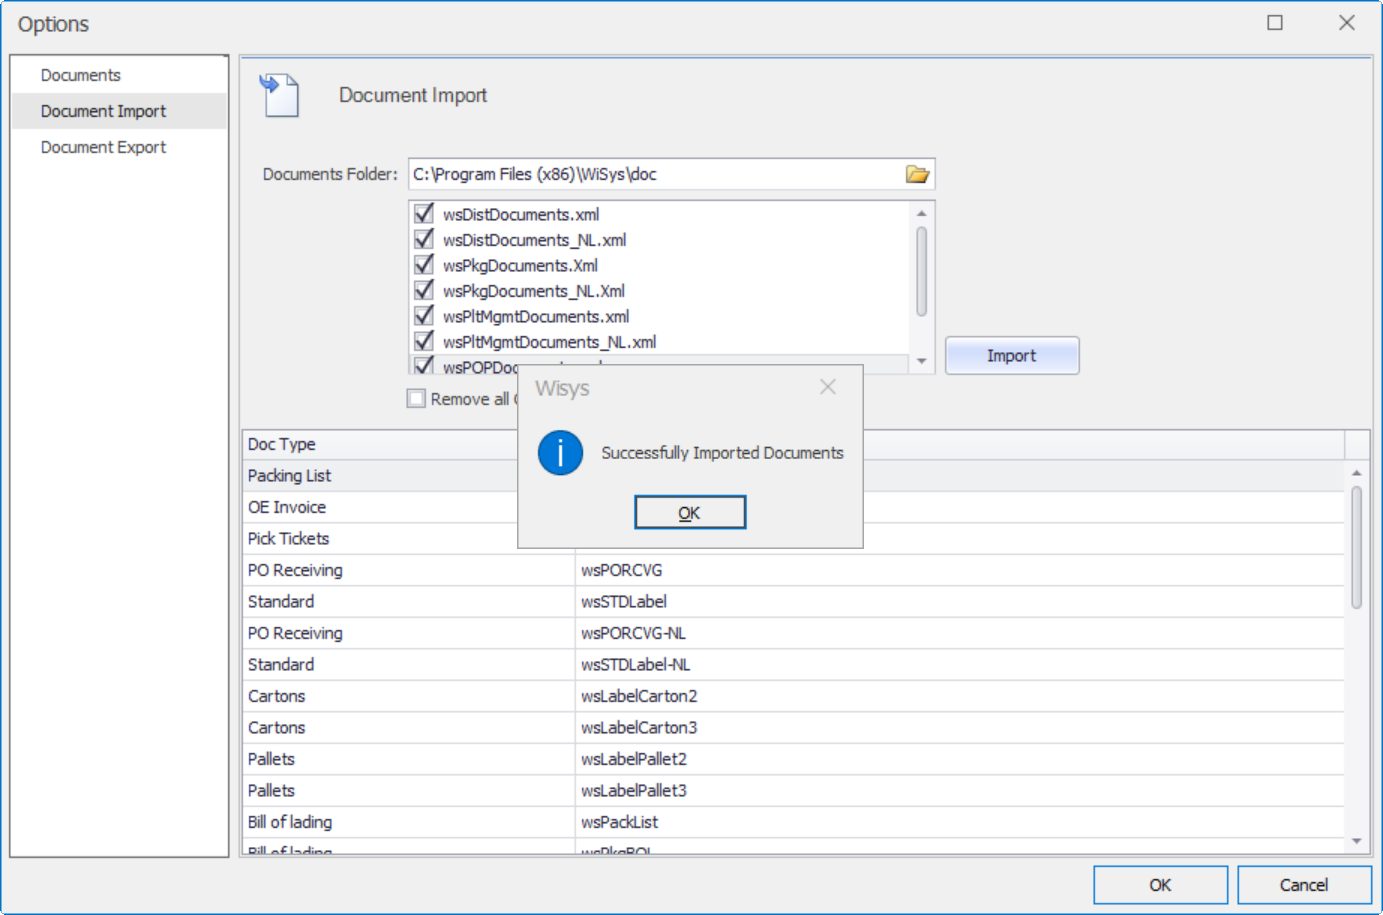
All the documents imported will now appear in the middle pane of the Documents Options screen. These documents are automatically assigned to print in every instance for every customer, or item, or product category. It is not necessary to map the document if you want the document to print for all instances.
Adding Custom Documents
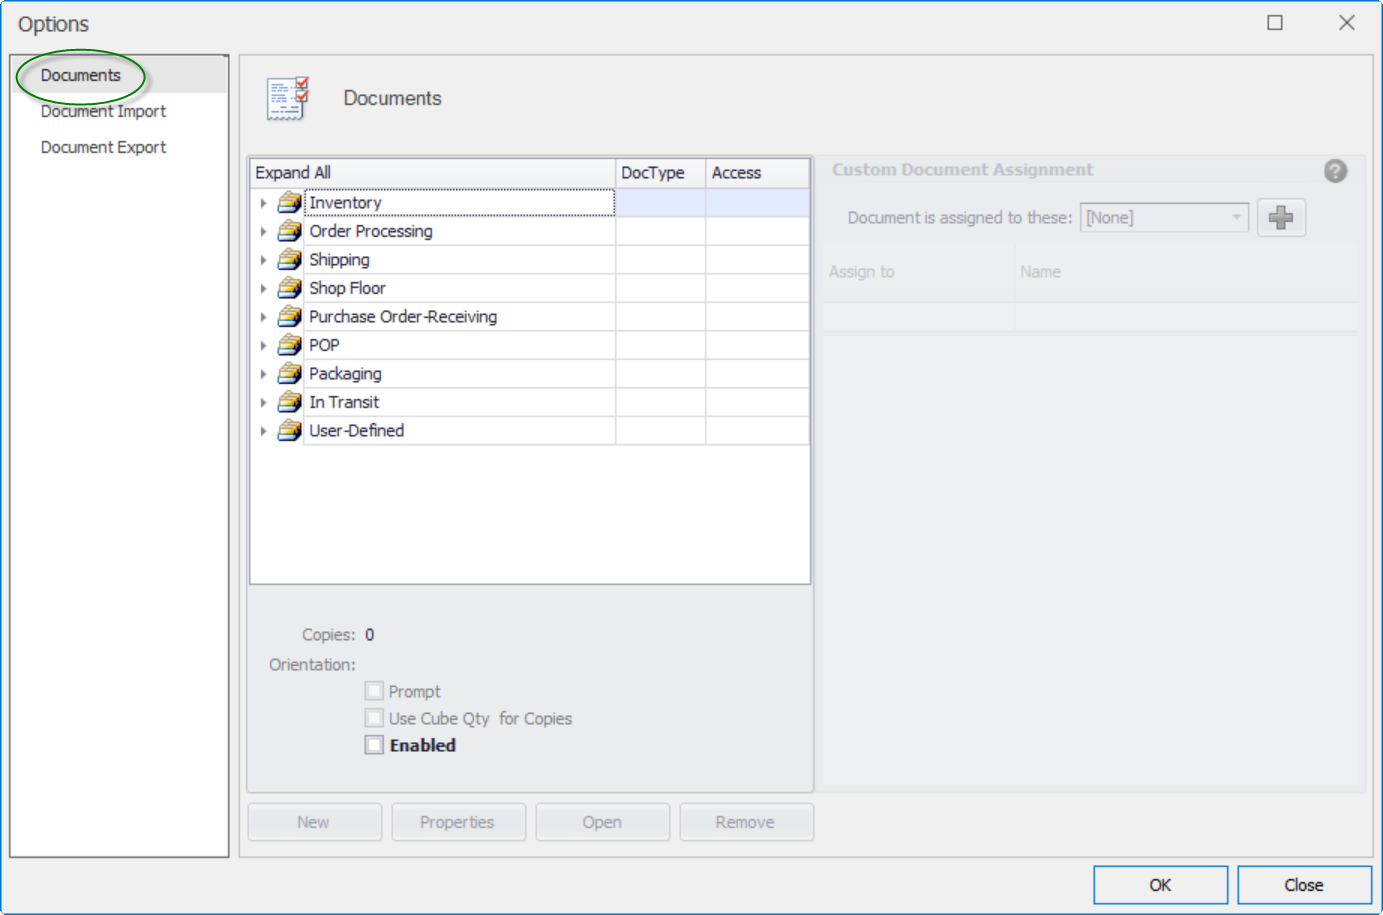
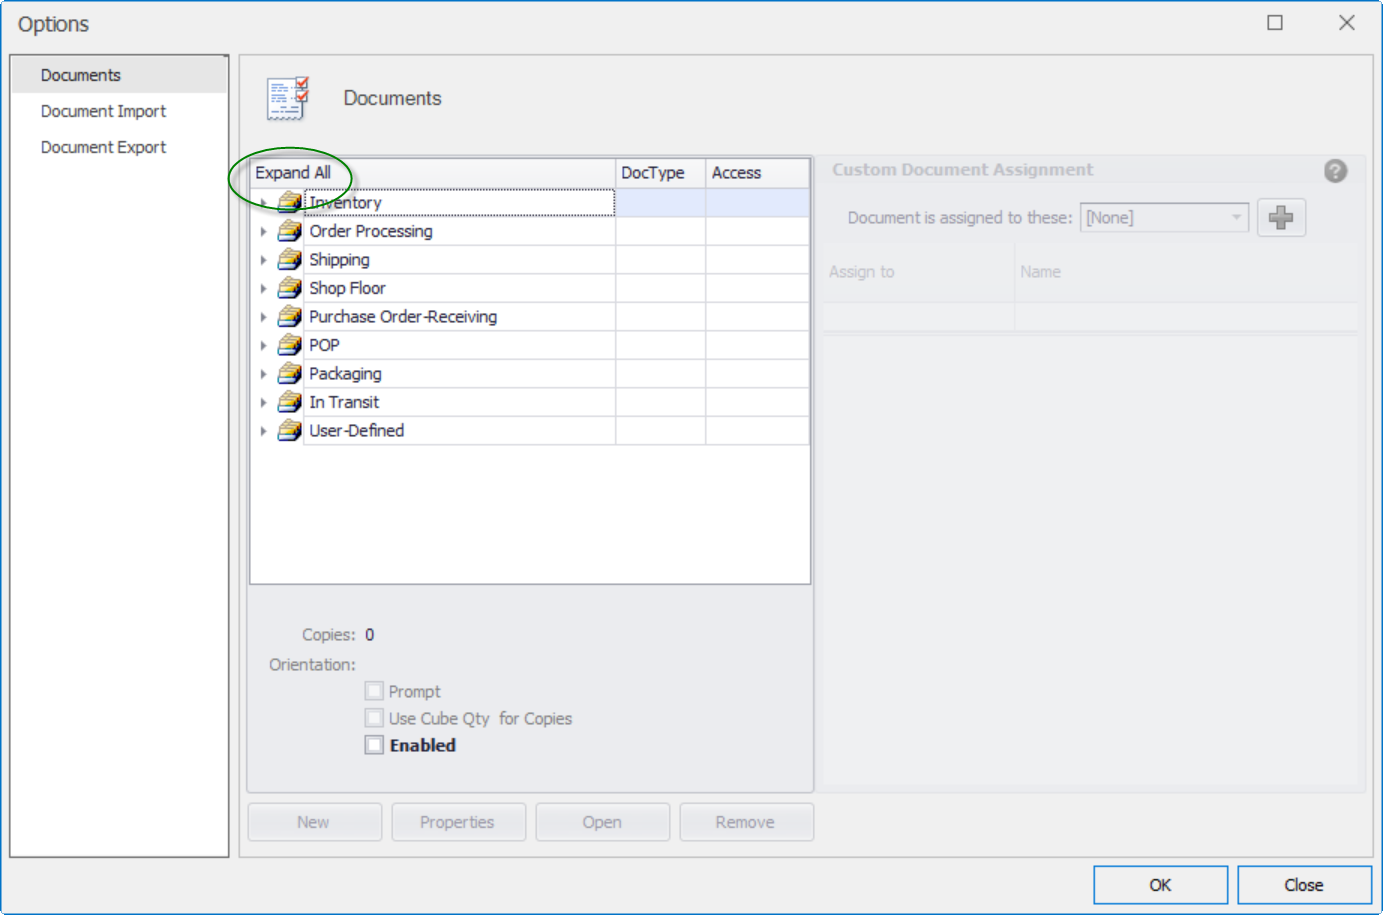
If you need to add your own report documents or labels you will need to add them to the system. To do this, click on "Documents" in the upper left pane to see all documents loaded into the Document Manager.
Figure 4: Documents
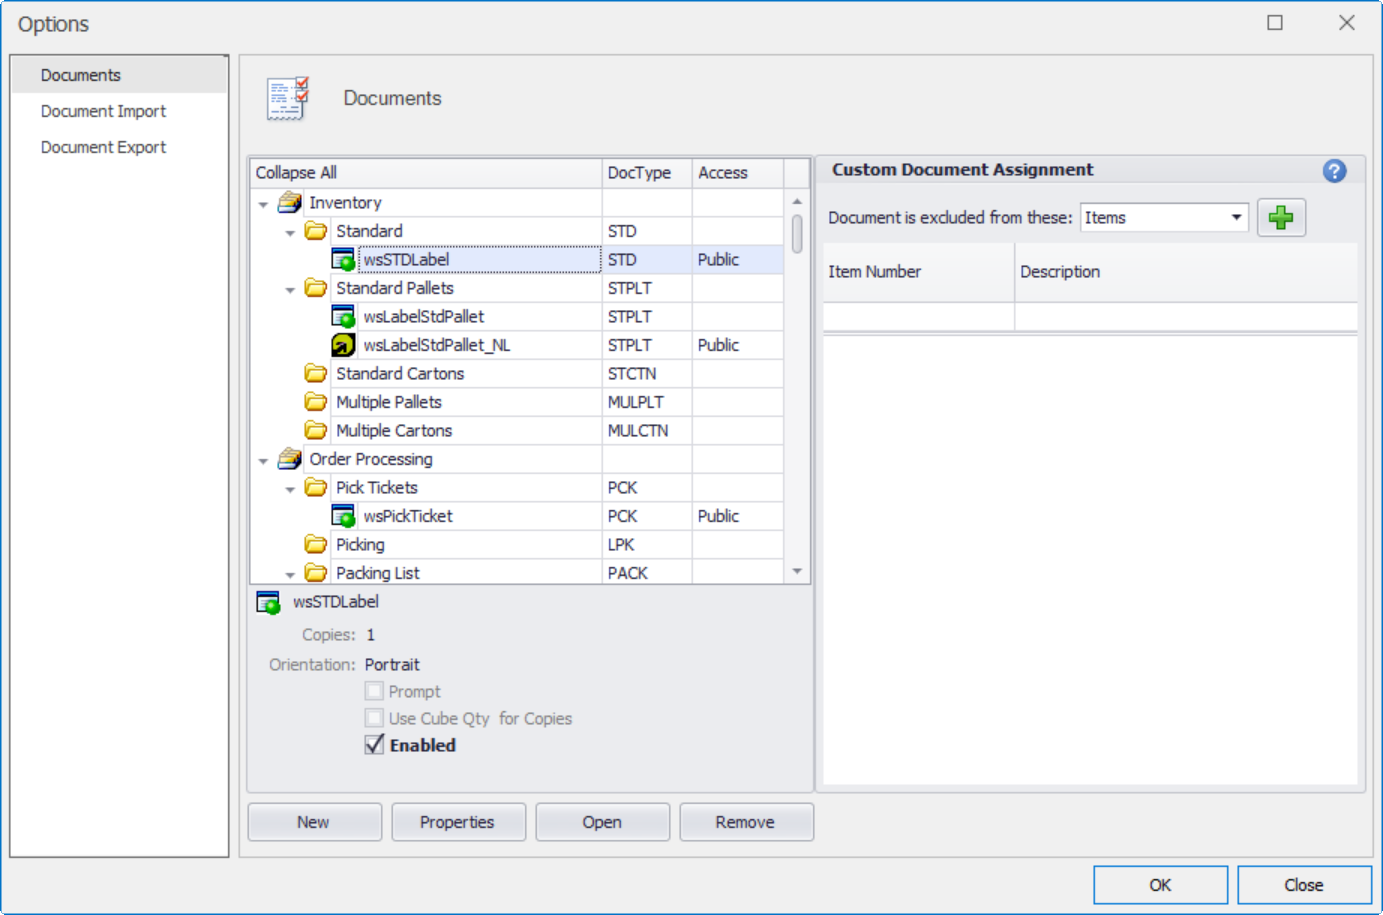
Click on "Expand All" to expand the tree.
Figure 5: Expanding the Tree
Expand the category (example: Shipping) and select the section (example: Bill of Lading) where you want to add a document and click on "New".
Figure 6: Adding New Document
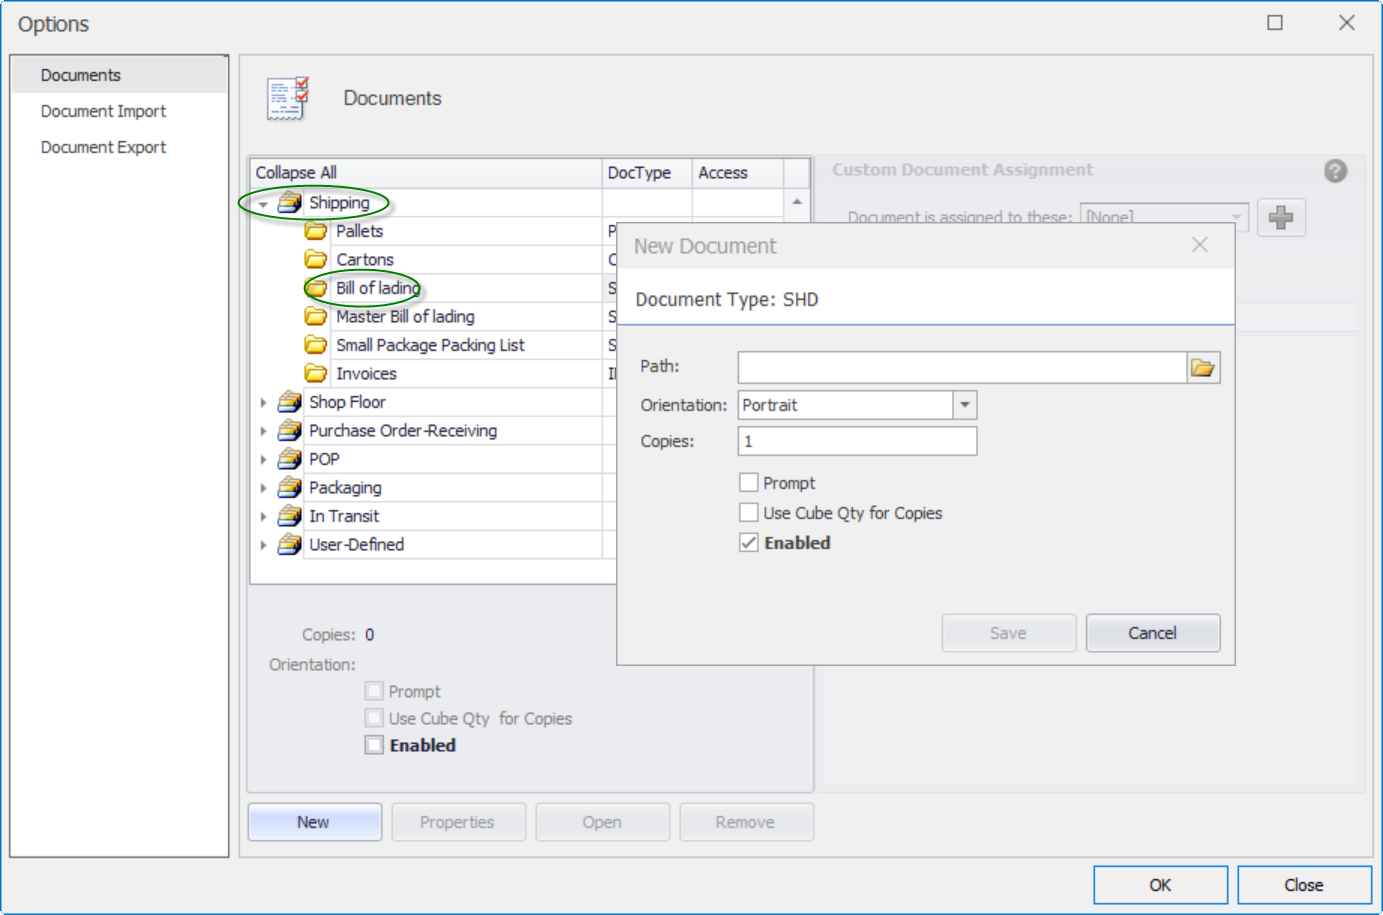
When the pop-up box appears, browse for the new document or type the path to the document in the box labeled "Path”. Select either Portrait or Landscape orientation from the drop down box. Enter the number of copies of the document you want to print in the box labeled "Copies”.
If you want the system to prompt the user for a number of copies to print, check the box marked "Prompt”. If you want the report to only be available to print on the printer specified in the report, check the box labeled "Default Printer” (not recommended for most sites).
Check the "Use Cube Qty for Copies" box if you want to base the number of copies to print on cube quantity. Click "Save" to add the document to Agility Documents.
Check the "Report disabled" box only if you want to store the document, but not currently make it active. This will prevent it from printing.
Figure 7: Selecting Document

In some cases you may want to print a custom document for only certain customers, items or product categories. After you have loaded your custom document you need to tell the system which customers, customer types, product types or items should trigger this special custom document. Begin by marking the document as "Private" in the Access column. Documents marked as "Public" print for all customers or items.
Figure 8: Documents Option screen
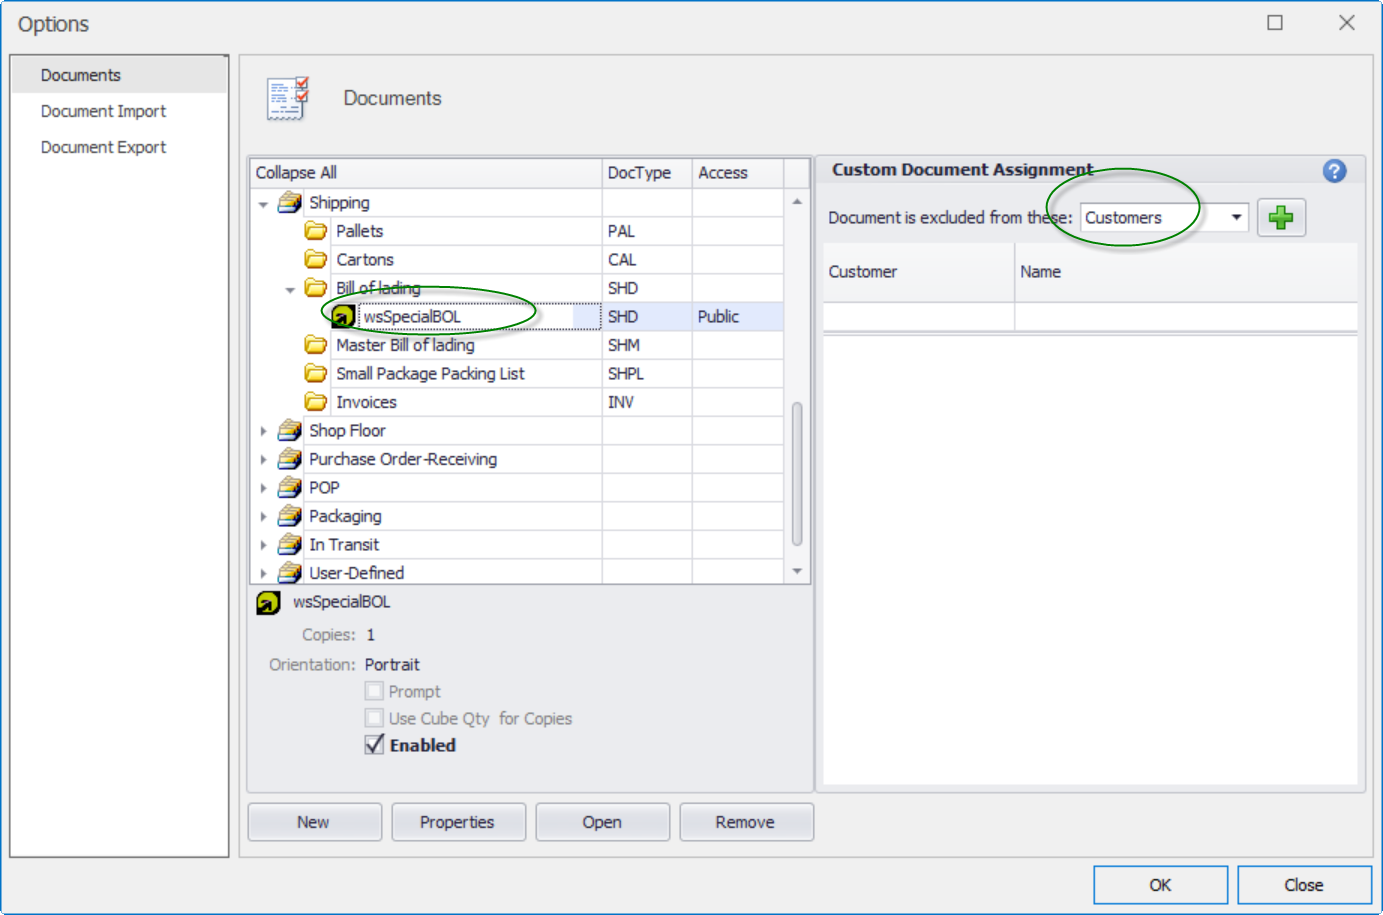
Next, highlight the custom document in the center pane. Use the drop down menu in the Custom Document Assignment pane to select the data type available for that document. In the example in Figure 9 below, the user is choosing to use a special Bill of Lading form for a customer. Click the green plus sign to bring up a listing of customers. Double click the customers you want to map to the special document and they will appear in the Assignment pane.
Figure 9: Setting up a custom form for specific customers
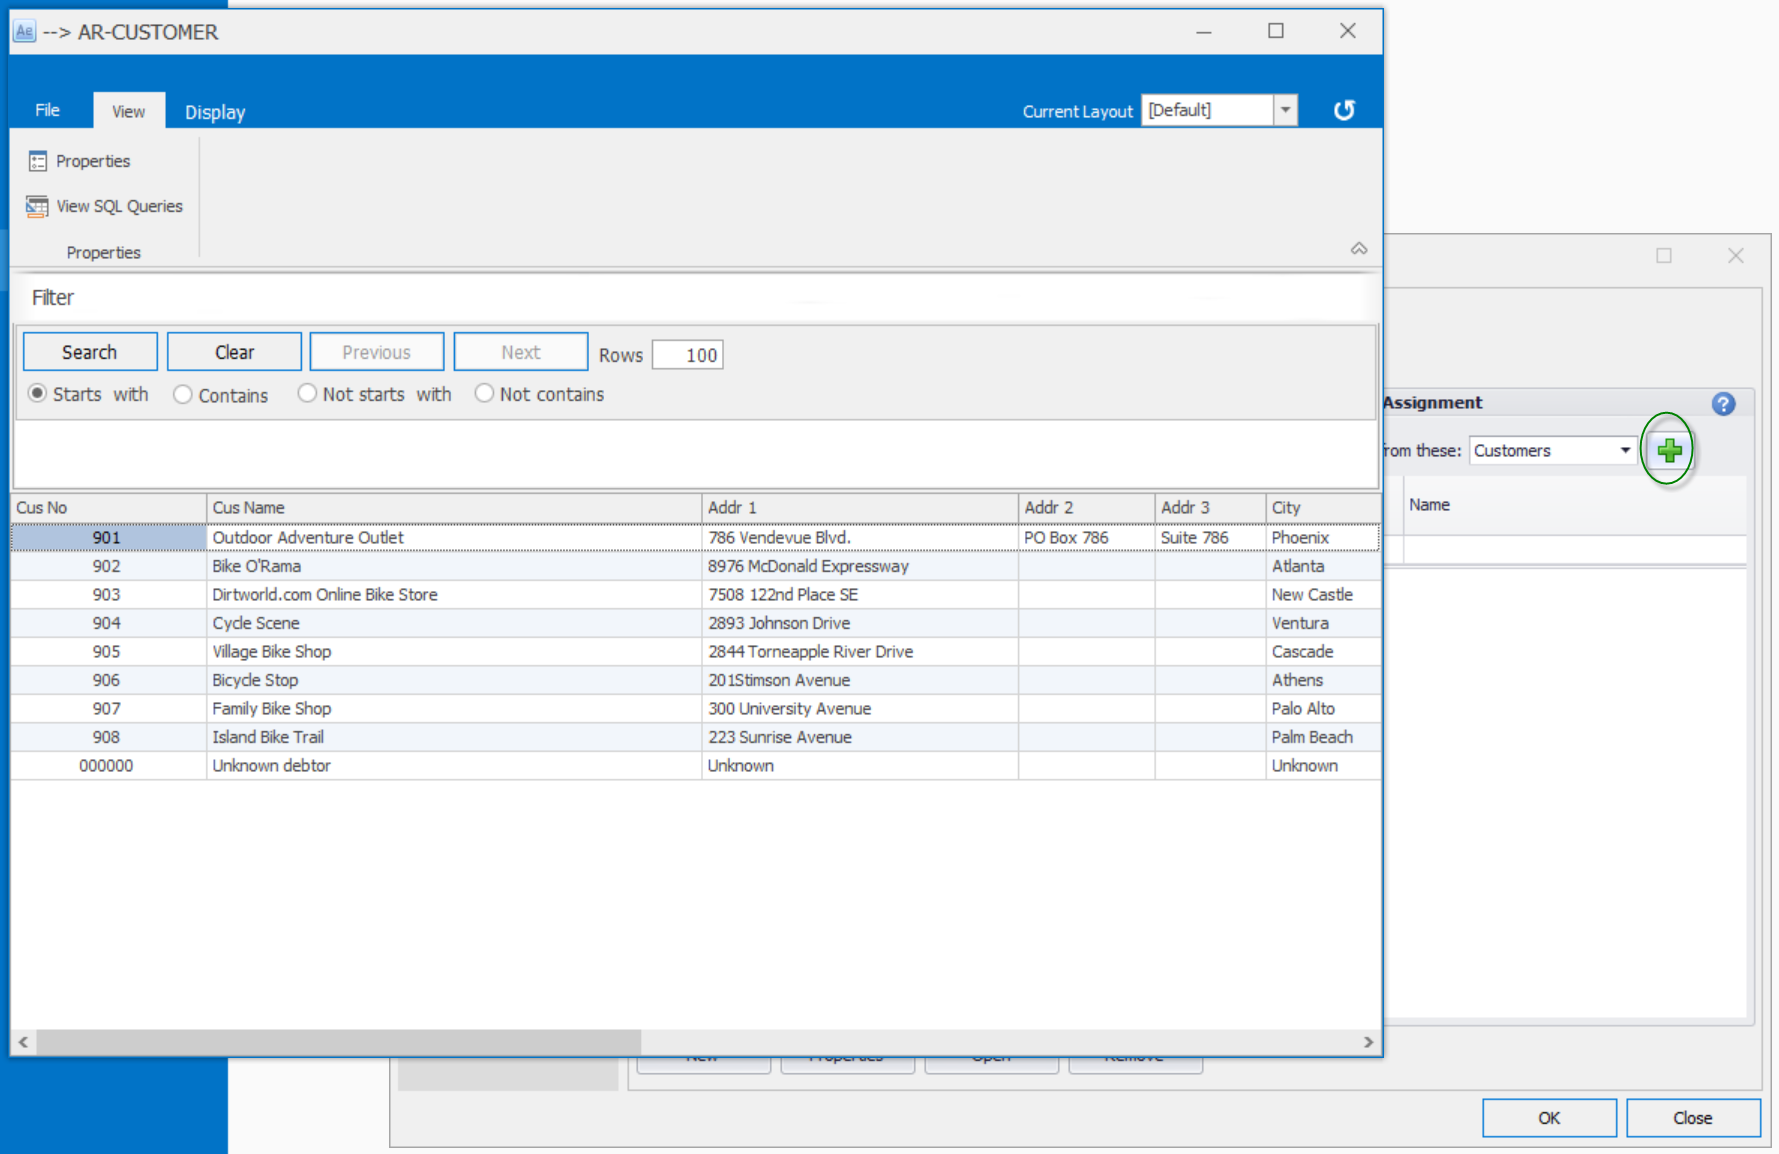
Figure 10: Customer Mapping for Custom Form
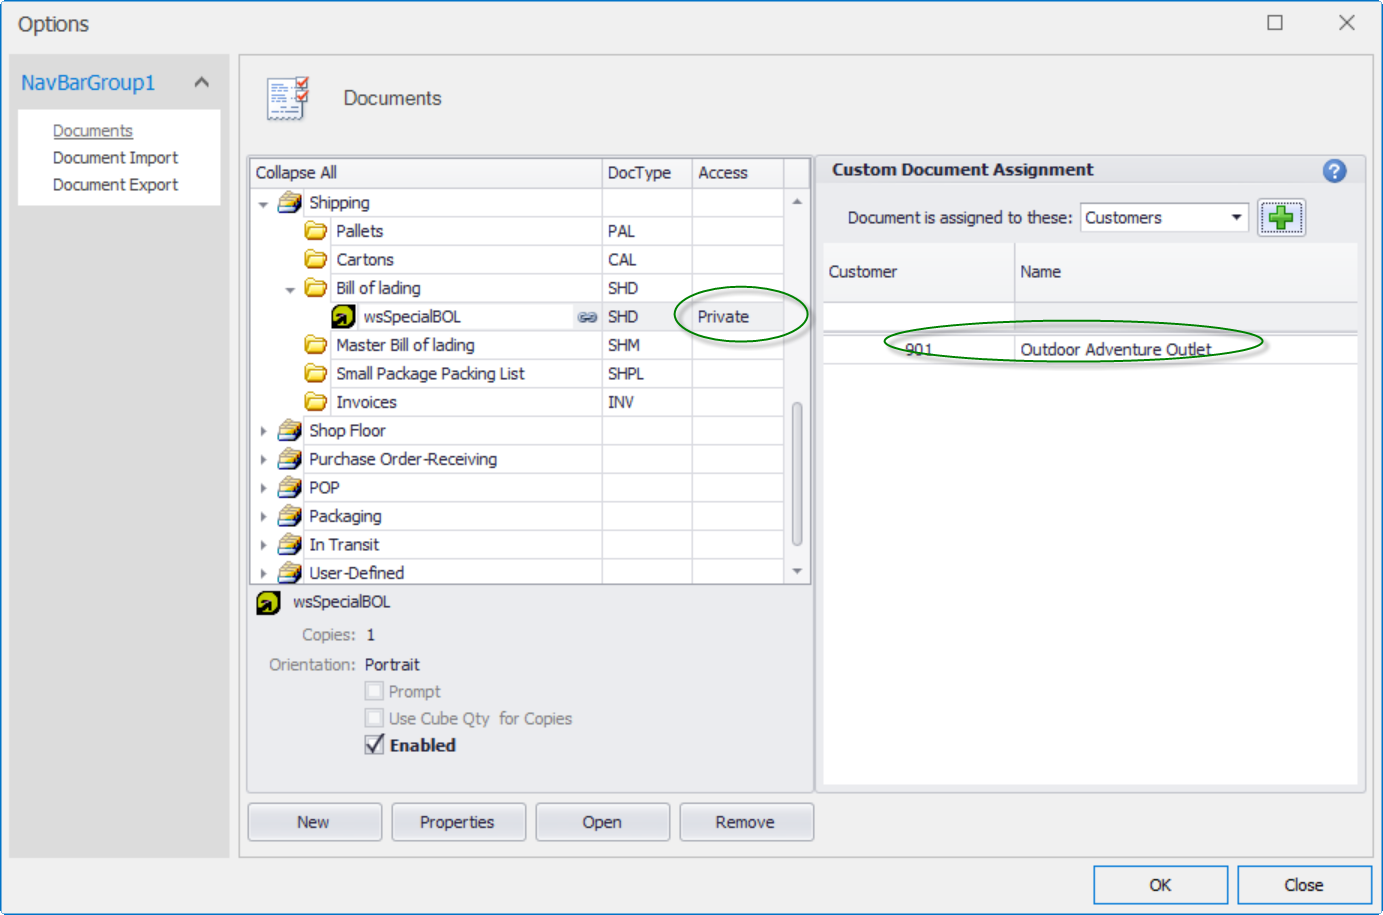
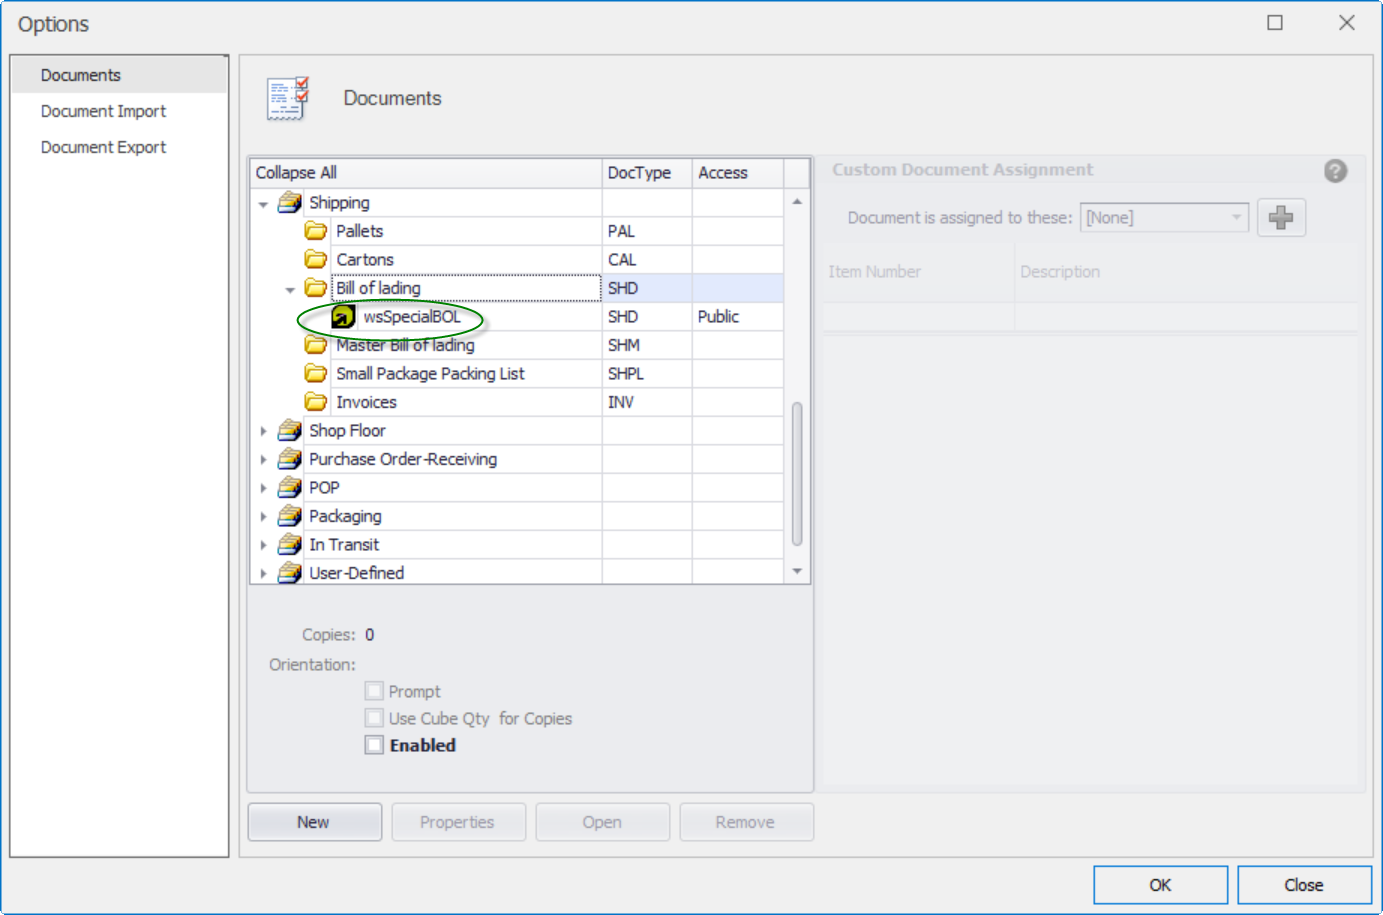
Once a document has a custom assignment attached to it, a linkage icon will appear next to it.
Figure 11: Custom Assignment linkage

Specific documents types can only be assigned to specific data elements (Items, Product Categories, Customer, Customer Type). A listing of these available linkages appears in Figure 12 below.
Figure 12:
|
|
ITEMS |
PRODUCT CATEGORIES |
CUSTOMER |
CUSTOMER TYPE |
Inventory |
|
|
|
|
|
|
Standard (STD) |
X |
X |
|
|
|
Standard Pallet Labels (STP) |
X |
X |
|
|
|
Standard Pallets (STPLT) |
X |
|
|
|
Shipping |
|
|
|
|
|
|
Pallets (PAL) |
|
|
X |
X |
|
Cartons (CAL) |
|
|
X |
X |
|
Bill of Lading (SHD) |
|
|
X |
X |
|
Invoices |
|
|
X |
X |
Shop Floor |
|
|
|
|
|
|
SFC Finished Goods (SFC) |
X |
X |
X |
X |
|
SFC Finished Goods Pallets (SFCPLT) |
X |
X |
X |
X |
|
SFC Issue (SFI) |
X |
X |
X |
X |
|
SFC Return (SFR) |
X |
X |
X |
X |
|
SFC Pallet Productions (SFP) |
X |
X |
X |
X |
Receiving |
|
|
|
|
|
|
PO Receiving Pallets (POPLT) |
X |
X |
|
|
POP |
|
|
|
|
|
|
POP Pick Tickets (PPK) |
X |
X |
|
|
|
POP Finished Goods (LPP) |
X |
X |
X |
X |
|
POP Finished Goods Pallets (LPPPLT) |
X |
X |
X |
X |
|
POP Return (LPR) |
X |
X |
X |
X |
Packaging |
|
|
|
|
|
|
Pallets (PKGLT) |
|
|
X |
X |
|
Cartons (PKGCTN) |
|
|
X |
X |
|
Bill of Lading (BOL) |
|
|
X |
X |
|
Invoices (PKGINV) |
|
|
X |
X |
|
Small Package Packing List (PKGPL) |
|
|
X |
X |
Exporting and Editing Documents
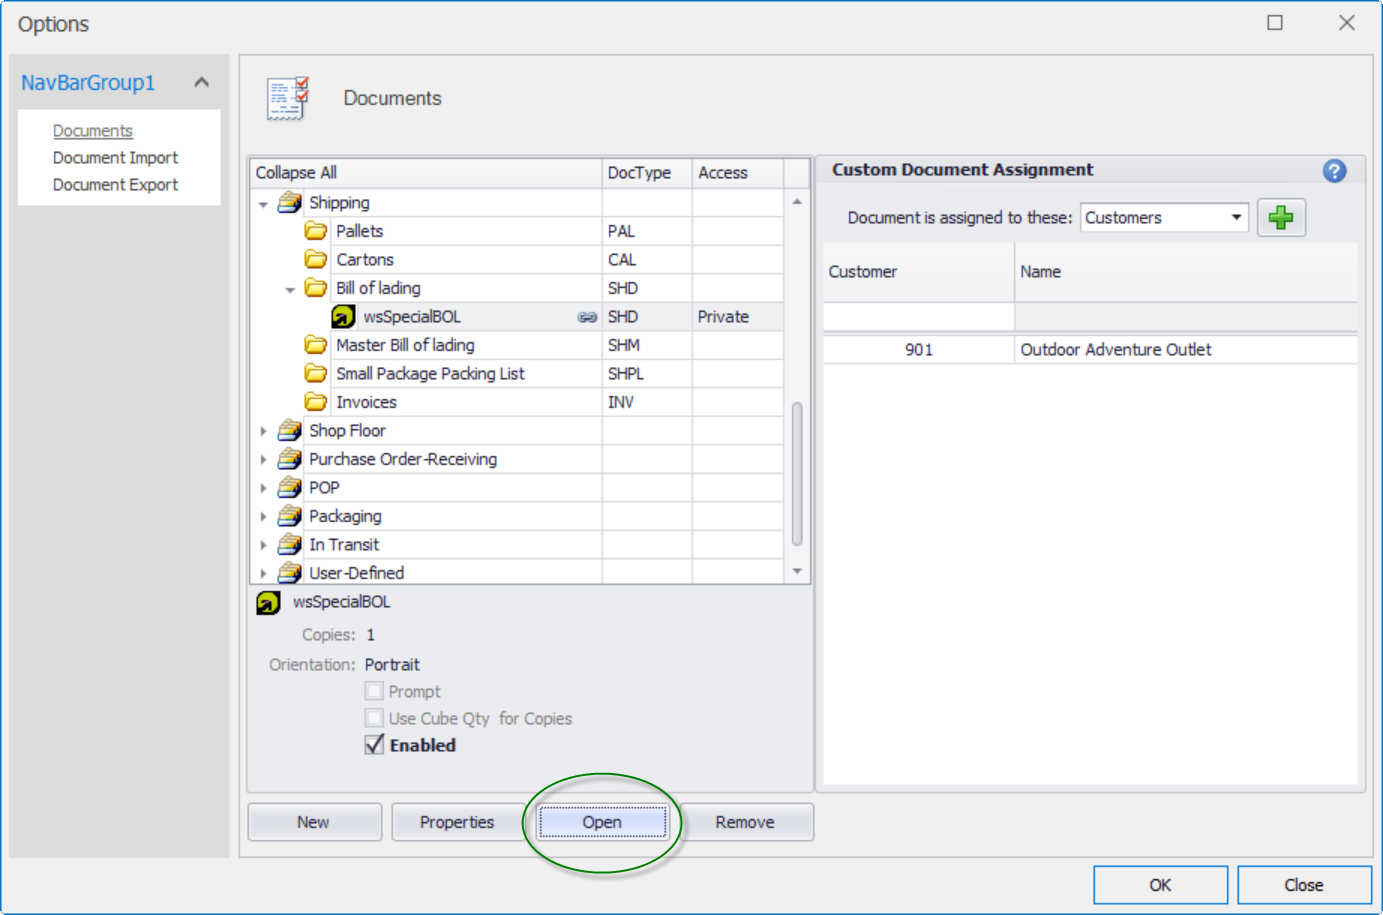
If you want to edit a document while in Agility Documents, highlight the document in the tree. Next, click "Open” in the Document Details box below. The report will open in the Crystal Reports or Nice Label program.
NOTE: You MUST have the appropriate label design software (Crystal Report or NiceLabel) installed on the workstation this step is performed on or the Open button will not function properly.
Figure 13: Opening a document
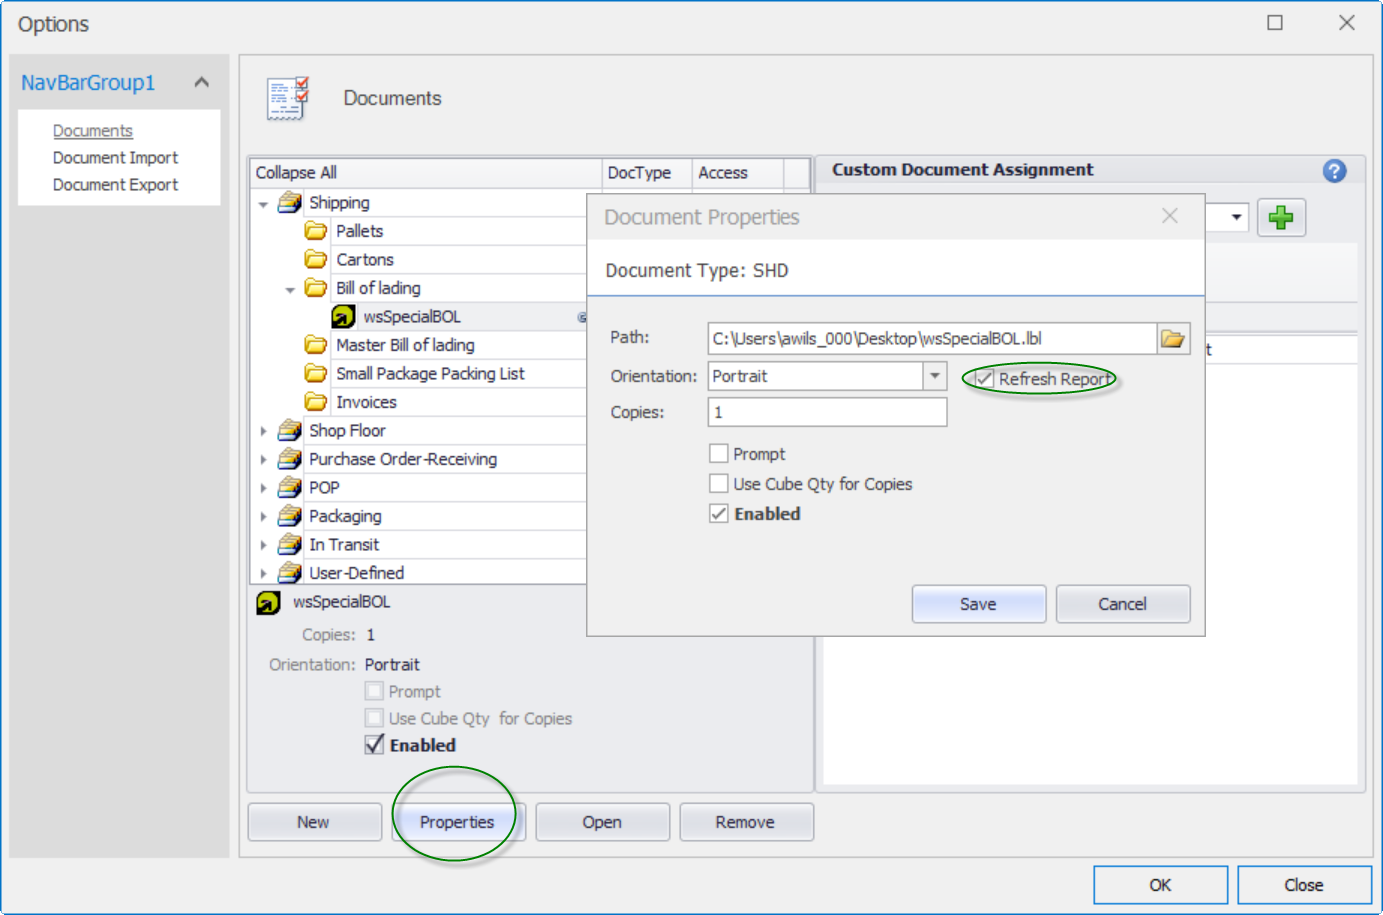
After you have made changes to the document, saved them and exited the design program, highlight the document and click "Properties". Next check the "Refresh” box to refresh the report in Agility Documents.
Figure 14: Refreshing a document
Sometimes you may want to make changes to an existing document. To do this, you first must export the document from the database where it is stored so it can be modified. Begin by selecting Document Export from the left pane of Agility Documents. When the list of documents appears, check the boxes for the documents you want to export. You can also choose to select or unselect all documents.
Figure 15: Selecting the documents to export
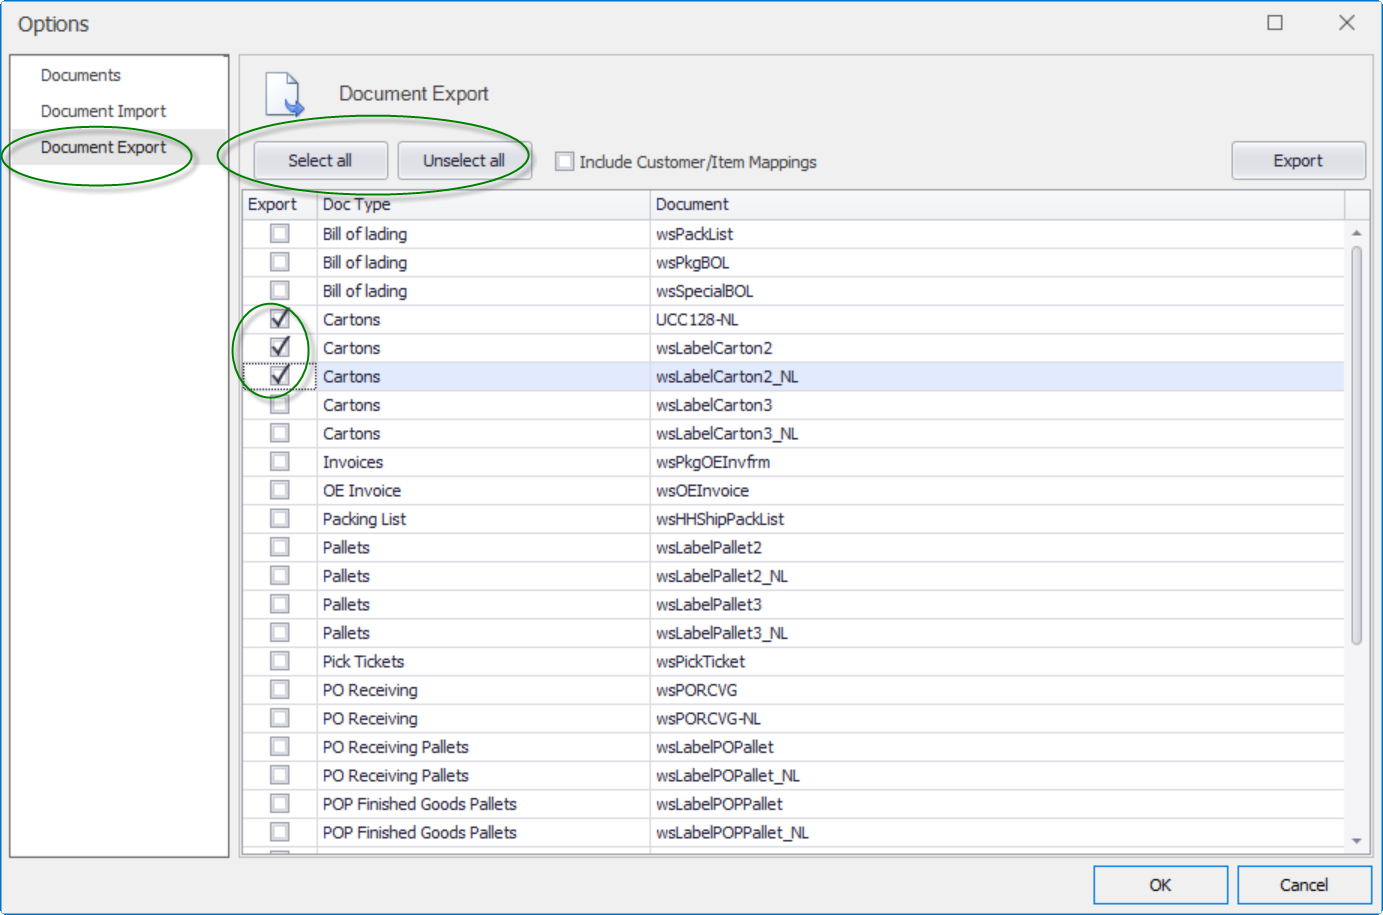
Click "Export” in the Document Details box. Then select the location where you want to export the document.