Nice Labels in WiSys
Requirements and Things to Know:
ü NiceLabel uses an ODBC driver for the database connection type. This ODBC connection is typically installed when the WiSys Client updater is run. If this WiSys client is not on the machine running NiceLabel, then establish it manually using the following:
User DSN (not System)
Driver type: SQL Server
Name: WiSys (Use exactly like this)
Description: WiSys Labels
SQL Authentication with user: WiSyslabels and password: (email support@wisys.com for password)
Set the default database if you want
Test the connection
ü A Single User version of NiceLabel will not work on a Terminal Server machine. Single user needs to be installed on a workstation. If you need to run on a Terminal Server, a multiple user license (5) will need to be purchased.
ü NiceLabel seems to work better using Views because table linking doesn’t work well. WiSys has developed views for the majority of tables that are used in their applications. If you need to add new fields that are not in these views, you can create a view from these views but don’t just modify as they will often get overwritten during an update.
Views currently available:
wsCLPkgLabel Package (wspkg), Package Line (wspkglin), Shipment (wspkgshipment), Order Header (oeordhdr), Order Line (oeordlin), Item Master (imitmidx_wv)
Defining Parameters (Variables)
The parameters used on the labels need to be these specific names because they are passed by the gun application. Below are the parameters for two of the labels:
Shipping Labels Parameter: Shipment compare to wspkg_Shipment_No
PkgNo compare to wspkg_PKG_No
Fast Shipping Labels Parameter: Shipment compare to wspkg_Shipment_No
UserID compare to wspkg_UDF1
Setting up a New Label
· File, New and define:
Printer
Select Stock – Leave at none
Page Size – usually leave to automatically set for label dimensions
Label Layout – determine if portrait or landscape
Label Dimensions – set to the size of the label
Import Variables – don’t set anything
Click Finish
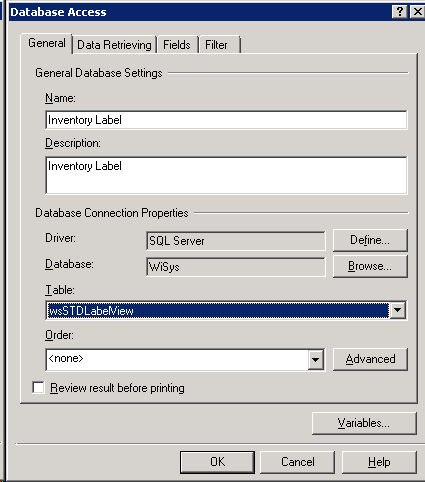
· Set the Database Access using: Data, Database Access
Click New and set:
Name: Name for this label (they typically use the view name, but you can name as desired)
Description: Name as desired. I’m going to use the menu option called from the gun.
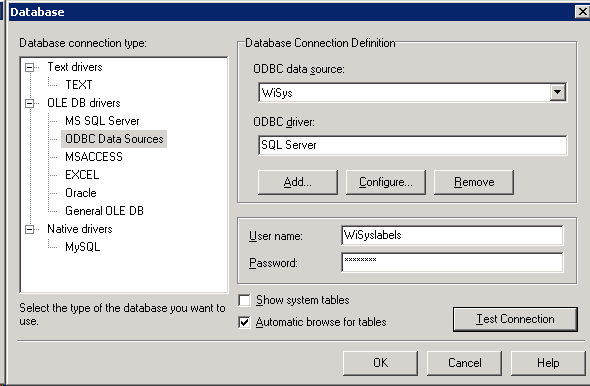
· Database Connection Properties, click DEFINE
Select ODBC on the left hand side and should default up the WiSys ODBC Data Source
Set the User Name and password: User: wisyslabels Password: (Email support@wisys.com for password)
Test the connection and select OK if successful
After the connection to the database is complete, you can set the table/view name.
 Table: Select the View Name for the information you will use on this label
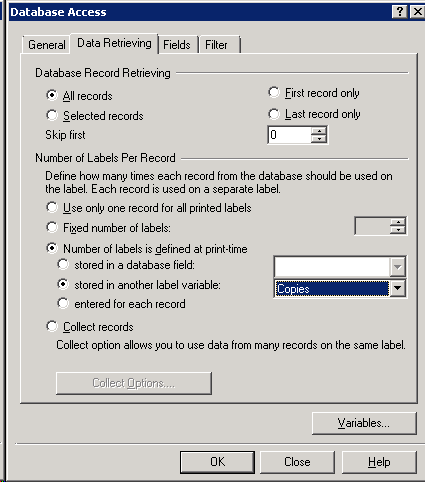
· Data Retrieving
For WiSys labels that are printed from the gun, always select:
Number of Labels is defined at print time
 Stored in another label variable

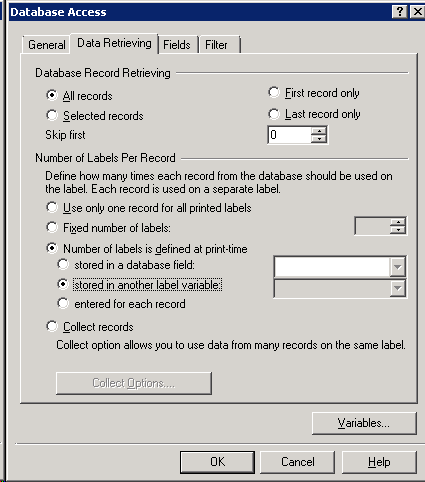
Click VARIABLES button at the bottom of the screen and select NEW
Enter the Name: Copies
Description: Copies
Source: Prompt (no need to change)
This is ALWAYS the variable name passed by the gun application
Select OK and Close
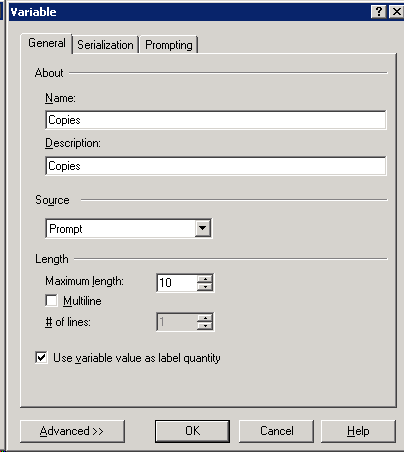
Next to the field ‘Stored in another label variable’ – select the ‘Copies’ from the drop down.

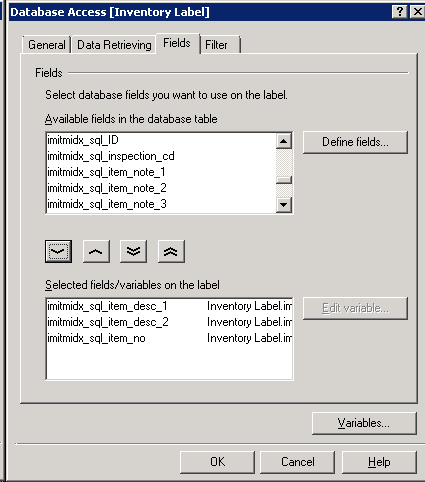
· Fields
Select the fields that will be used on the label.
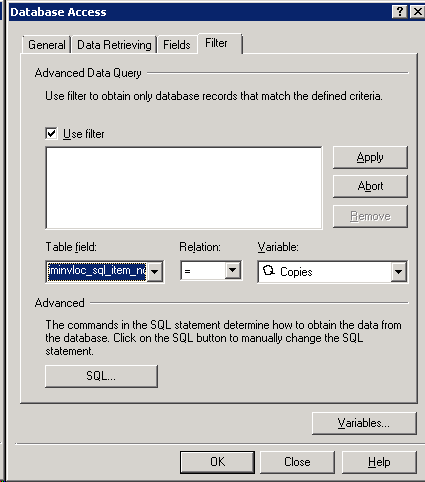
· Filter
This is where you are selecting the parameter (variable) that is passed from the gun application. The parameter name must match what is being passed from the gun – see the above list for the parameters for the PO receiving and Inventory labels. This field will be compared to the field value (similar to a record selection formula in Crystal is compared to the Crystal parameter)
Select ‘Use Filter’
Click the ADD button
 Table Field: Select the name of the field will be used to compare the variable, for instance iminvloc_item_no

Press the VARIABLES BUTTON and then select NEW to define this new variable
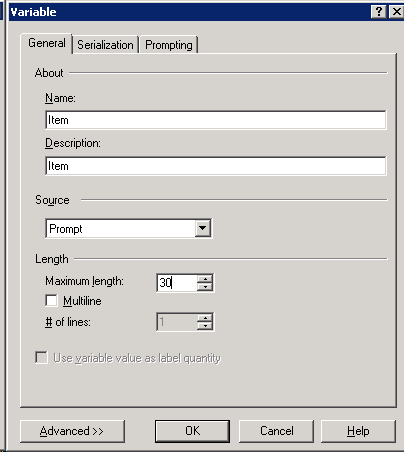
Name: Use the name of the variable used by the gun application – see the above list.
Example: Item
Description: Use the same as name
Max Length: You can set to the length of the field
Click OK and Close


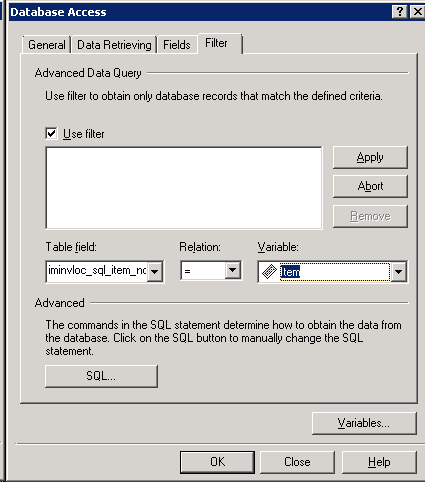
Complete the comparison by selecting the Table field to compare to the newly created variable from drop down list.
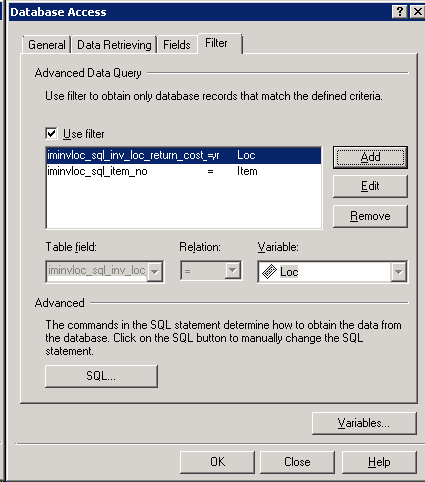
Click APPLY
Click OK
Notice the below screen shows two filters as needed for the Inventory Label
Laying out the fields on the Label
Once the database connection, fields and variables are defined you can start designing the label layout.
Left Hand Side menu is used most often in designing the label – below are the options most commonly used.
Text – select the drop down and then Use Existing Variables to see the fields available for this label
Bar Code – select the drop down and then Use Existing Variables to see the fields available. When you drop out a field from this option it will be in the bar code format. Right click and select properties to change the type if needed. Most commonly used is CODE 128
Text - Fixed Text can be used for field labels or headings
Once labels are defined and saved, you can load to WiSys Document Management.