EDIT BILL OF MATERIALS
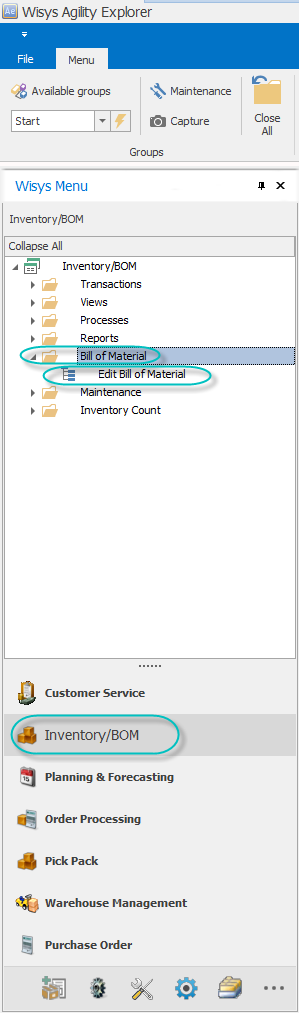
Overview – Edit Bill of Materials provides a split view for Items that are manufactured or kitted with a detail grid below that displays the components associated to the Bill of Materials. It also allows the user to make modifications to the Bill of Materials.
Figure 1: Edit Bill of Materials
Main Grid SQL – The Main Grid data is populated from the Item Master table IMITMIDX_SQL based on the manufactured flag in the item master = ‘M’.
Figure 2: Edit Bill of Materials Main Grid
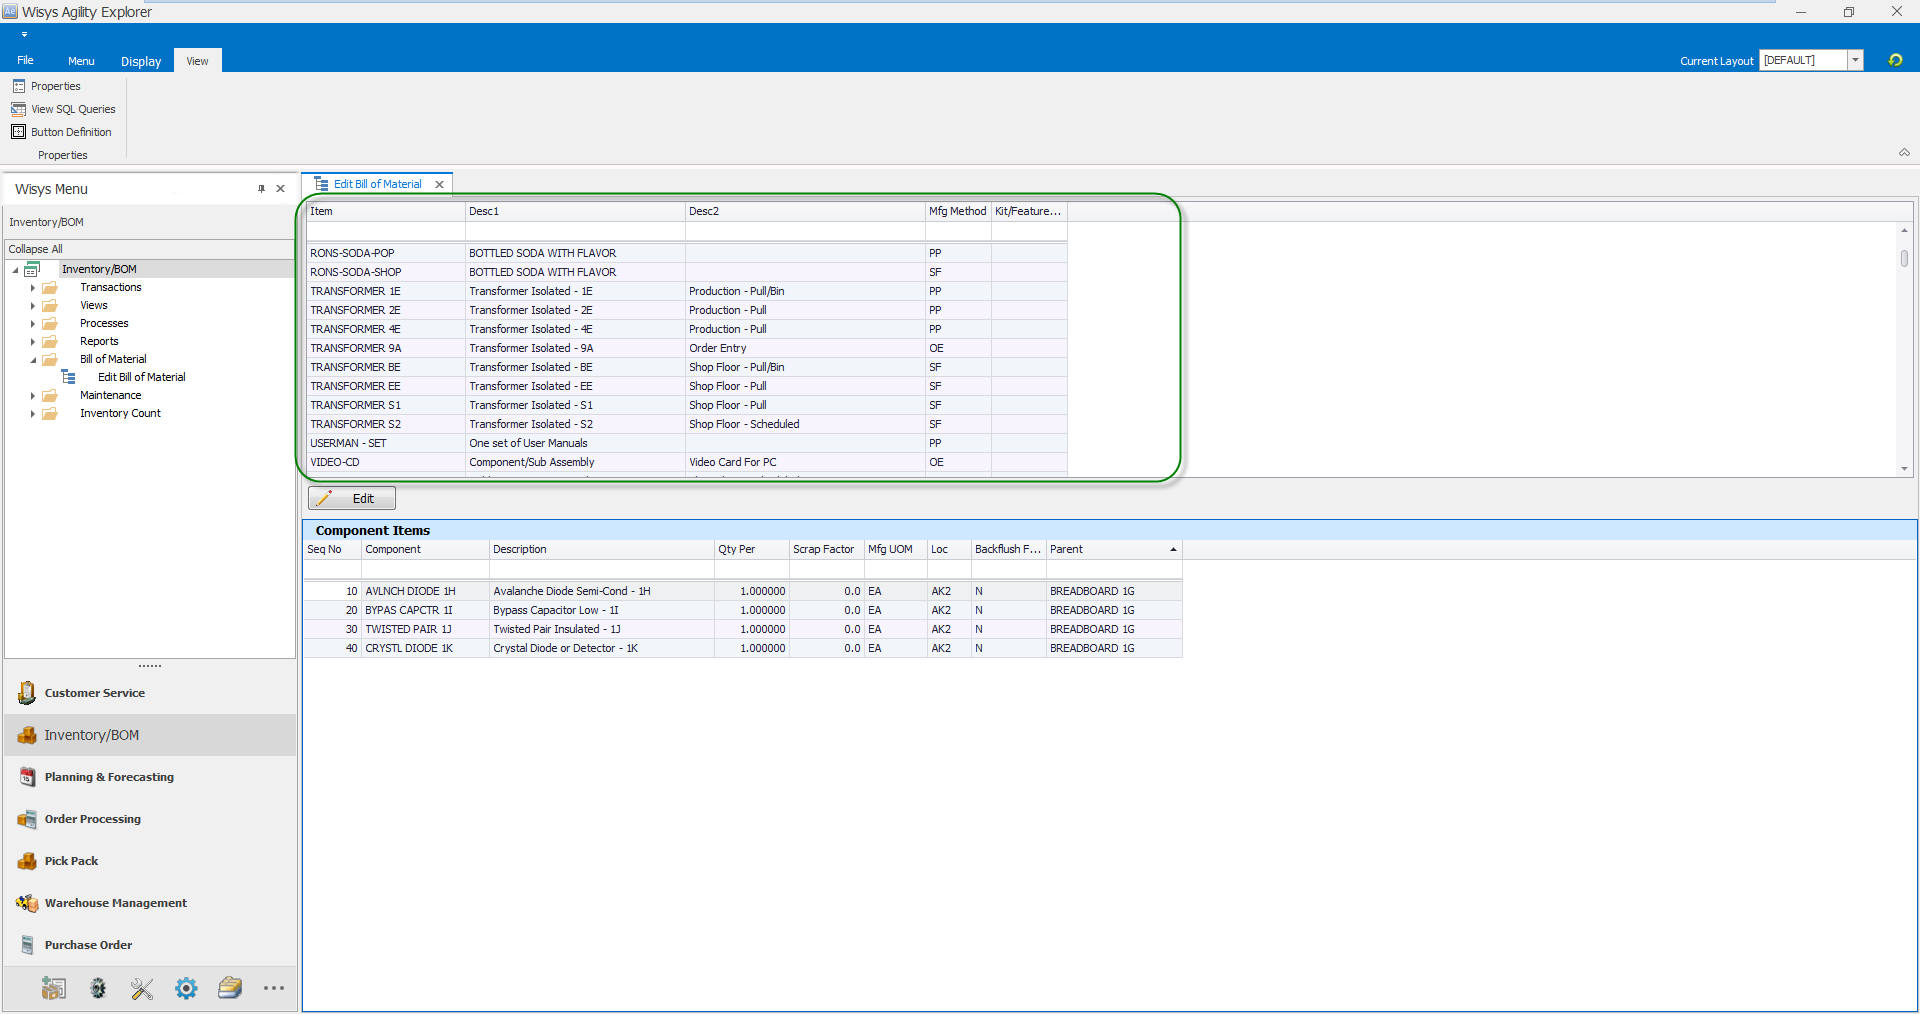
Child Grid Overview – The Component Items detail grid displays all components that are listed in the Bill of Material for the Parent Item selected on the Main Grid. It displays component number, quantity per parent and if the component is back flushed or not.
Figure 3: Edit Bill of Materials Child Grid based on parent grid focus row
Child Grid SQL – The Child Grid data is populated from the Bill of Material table (BMPRDSTR_SQL) and the Item Master table (IMITMIDX_SQL) joined on the Parent Item no from the Main Grid.
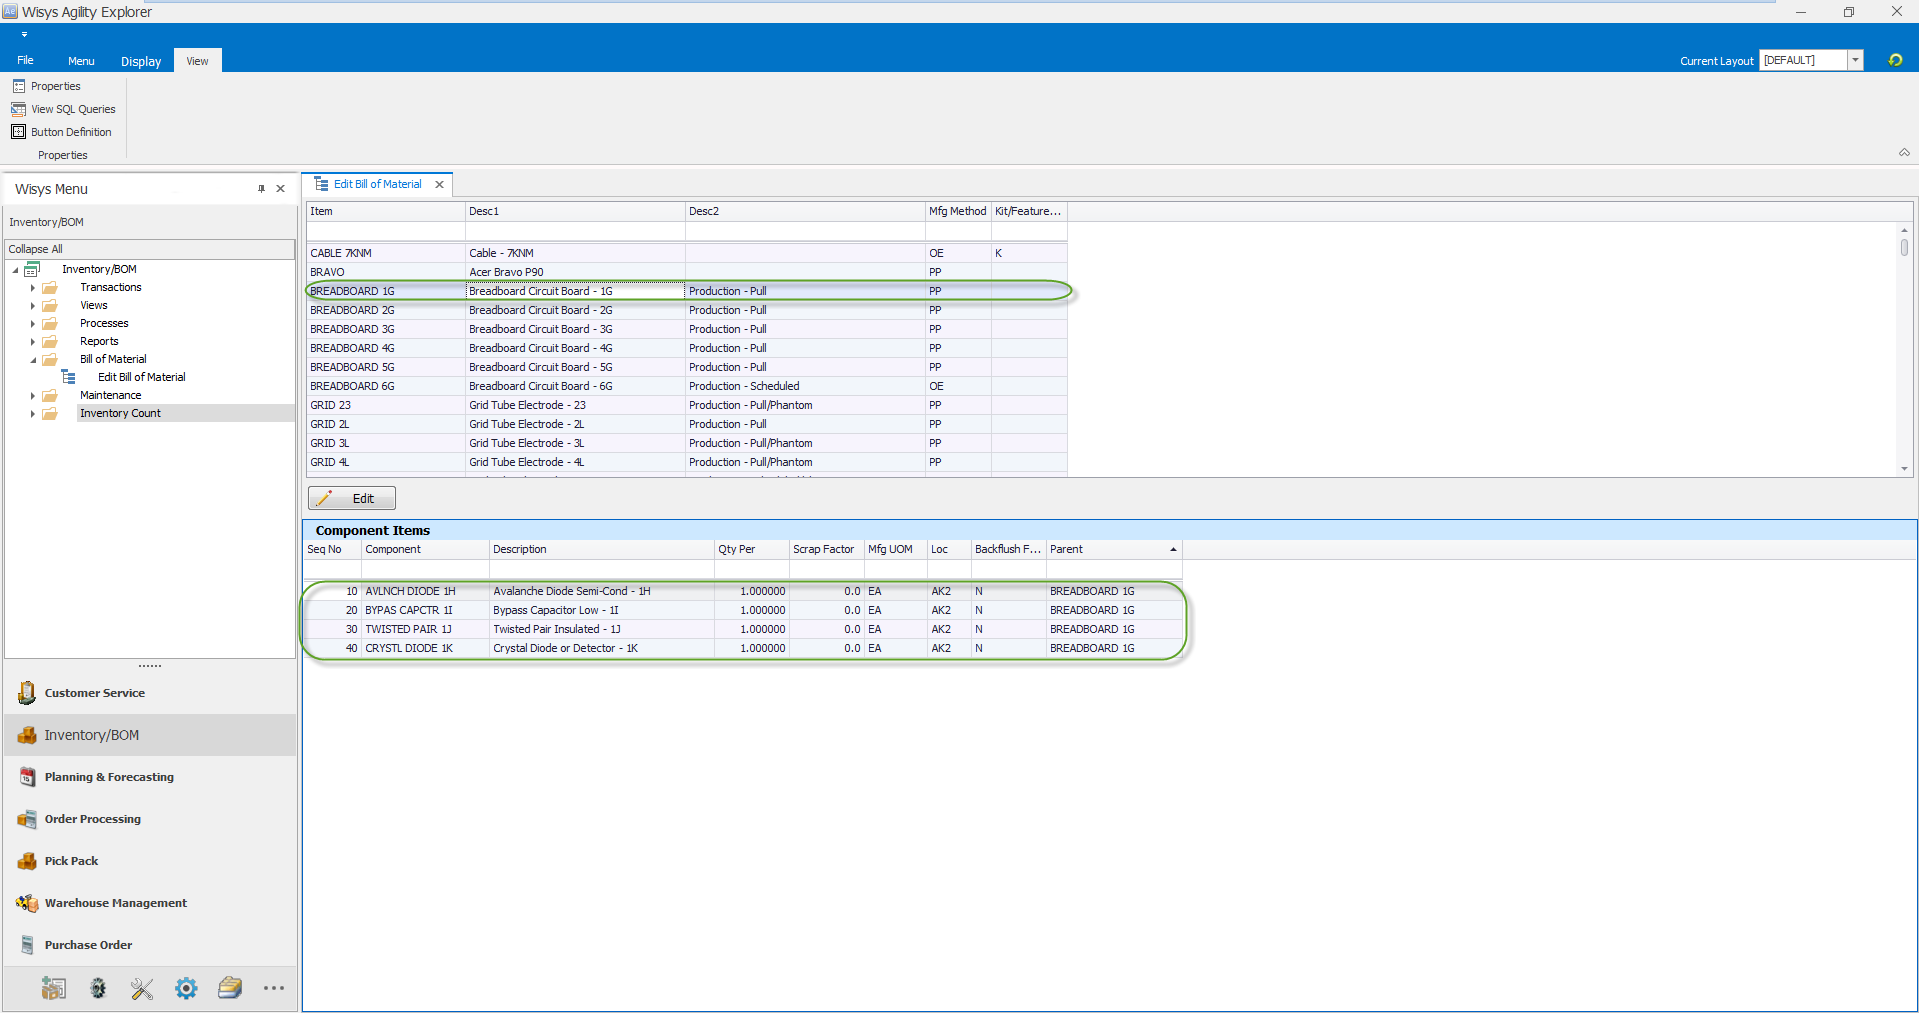
Buttons – The Main Grid has an “Edit” button that allows user to edit the BOM. When Clicked it will open a secondary window “BOM Editor – Process Grid”
When you open the BOM Editor the top grid populates with all items in your Macola item master that have been flagged as manufactured. The bottom grid shows the component items for the item selected in the top grid. To make a change to a component item, highlight the finished good item in the top grid and click the "Edit" button at the bottom of the grid as seen in Figure 4 below.
Figure 4: BOM Editor grid
A new window will open with all component items displayed in the grid. To make a change to an existing field for a component, such as the backflush flag, simply click that field for the component item you want to change and make the change. To save the change, either click off that row and onto a new row, or tab to the next field and your change will be saved. Any field with a column heading in bold letters can have its value changed.
Figure 5: Fields to Edit

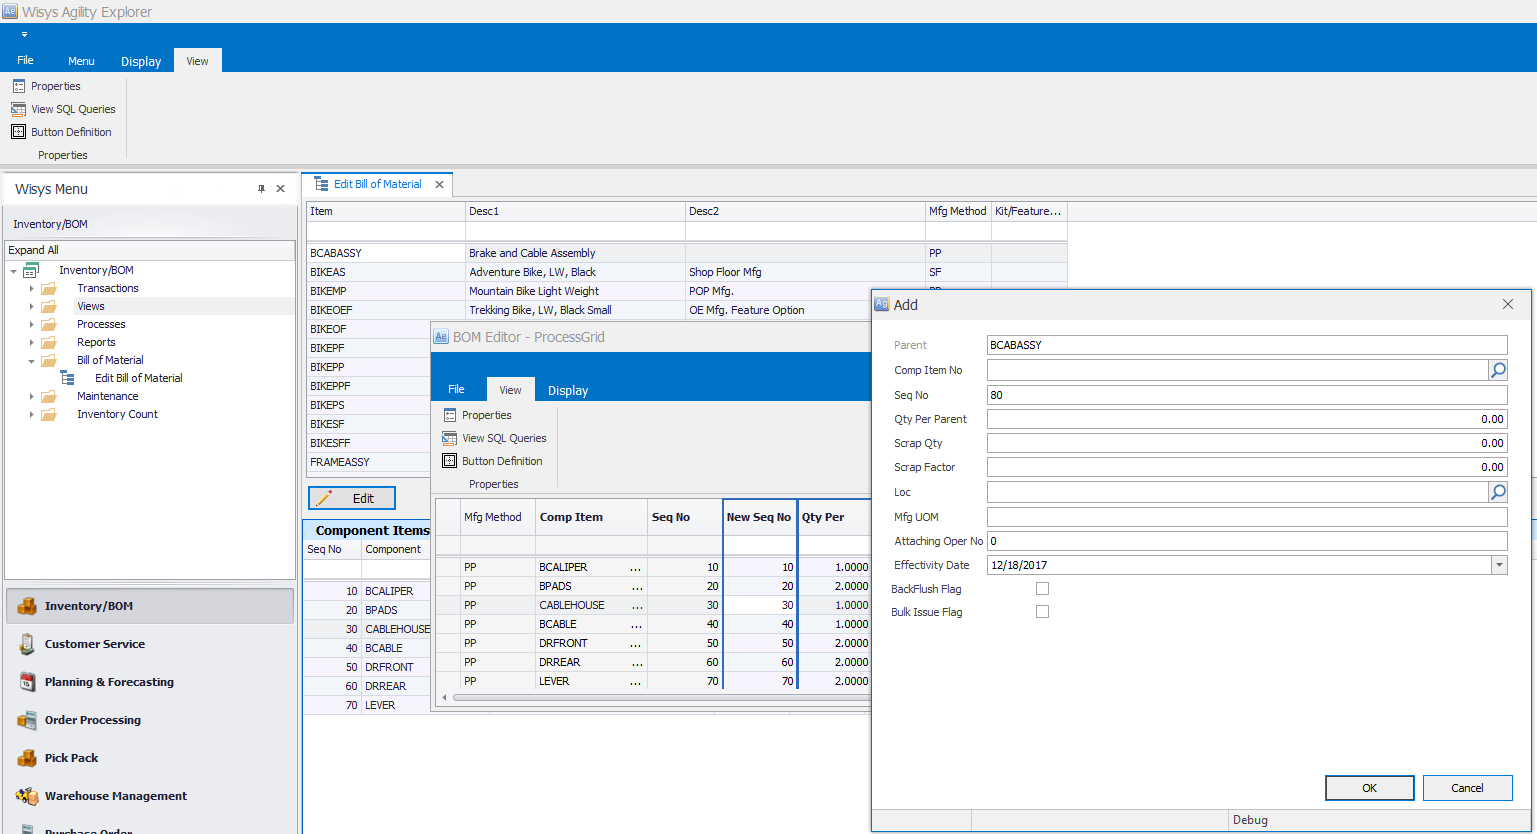
To add a new component to the list, right click in the grid and select “Add”. This will open a new form and the details of the new component item can be entered here. Take note of the existing sequence numbers for the component items and assign the new sequence number accordingly.
Figure 6: Adding a component
If you need to reassign a sequence number, use the "New Seq No" column and enter the new sequence number for the component item you wish to adjust. If you want to insert a new component at sequence 20 first reassign the existing sequence 20 by changing its value and then click off that row to save the change. After that is complete, you can use the add button to add a new component at sequence 20.
To delete a component item, click on the row of the component to be deleted and then right click your mouse and select Delete and the component will be deleted. Note: you will not receive a warning after hitting delete so be sure you have the correct component to be deleted selected.
8/27/2018RC