PRODUCT UPDATER
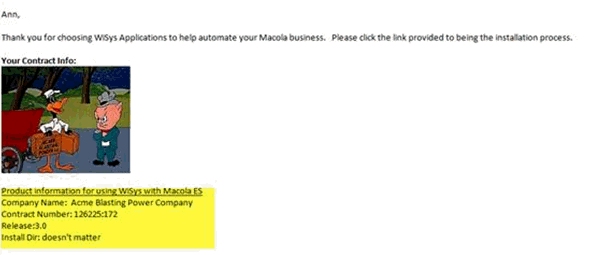
When you first purchase WiSys products, you will receive an e-mail containing a link to download the file "WiSys Product Updater Install". You must have the information in that e-mail to complete the installation successfully. If you do not have the e-mail, please contact support@wisys.com or at 770-955-3530 before proceeding. The highlighted section below shows you the information needed.
Figure 1: Email from WiSys with Company Name and Contract Number
Install Packages Explained:
· The two files available for download from the www.wisys.com/support/ are install packages to install the Product and Client Updaters, once installed they must be run to install WiSys applications.
o Product Updater
§ Installed on Server
§ Installs WiSys applications at the server level, downloads necessary files from WiSys server.
o Client Updater
§ Installed after Product Updater
§ Installed on client machines
§ Downloads files from server where Product Updater was installed.
Installation Notes:
· You must be logged in as an Administrator with Domain Admin rights and Admin rights to the local computer to successfully download, install and execute the WiSys Product Updater.
· The Product Updater must be run from the same location each time it is run, using the same domain administrator account. Therefore more than one user in the organization should know this user name/password.
· WiSys programs will install to whatever drive the Windows installation is on. If installation is required to a drive other than where Windows is installed, extra configuration and consulting fees could apply.
Where to Install: The Installation should be done on a server not a workstation. This server must be able to connect to your MS-SQL server
· If Agility Mobile (formerly known as PocketES/Agility WMS) will be run on handheld devices, the Product Updater should be run on the server where Remote Desktop or Terminal Services is running. By doing so, this will update WiSys and all Terminal Server clients in one step.
· If Agility Mobile is not part of the installation, then the Product Updater should be run on the SQL Server.
Note: If you later decide to move locations of the Product Updater, the Product Updater can be moved to another server. Please contact support and we will review with you the best way to move your installation files and update security to identify this new server as your Product Updater server.
Installing on Terminal Server:
When installing on a terminal server, you must first put the Terminal Services server in Install Mode.
1. Click Start, and then click Run.
2. In the Open box, type “cmd”, and then click OK.
3. At the command prompt, type “change user /install”, and then press ENTER. The following message appears: User session is ready to install applications.
4. Type “exit“, and then press ENTER.
5. Add or remove the programs that you want.
When the installation is complete, return Terminal Services to “Execute” mode.
1. Click Start, and then click Run.
2. In the Open box, type “cmd”, and then click OK.
3. At the command prompt, type “change user /execute”, and then press ENTER. The following message appears: User session is ready to execute applications.
4. Type “exit”, and then press ENTER.
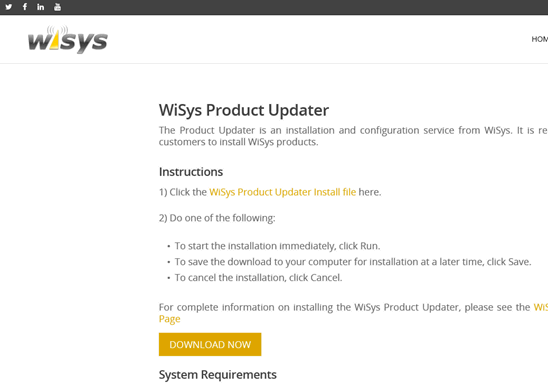
The Product Updater Installation file can be located at WiSys Product Updater
Click the WiSys Product Updater Install file or Download Now button (Figure 2)
Figure 2: WiSys Product Updater download
There are several options for running the install depending on your operating system (OS), also note the following Figures may vary due to OS.
Pre Windows 2008
· You can Run the install directly from the download page (Figure 3)
· or Save the file to run at a later time. (Figure 3)
Windows 2008 or later
· You will need to Save the file (Figure 3)
· Click Open Folder (Figure 4)
· Right click the icon and select Run as Administrator even when logged in as Administrator (Figure 5)
Figure 3: Run or Save File depending on operating system

Figure 4: Downloaded file

Figure 5: Windows 2008 & Later – Right Click\Run as administrator
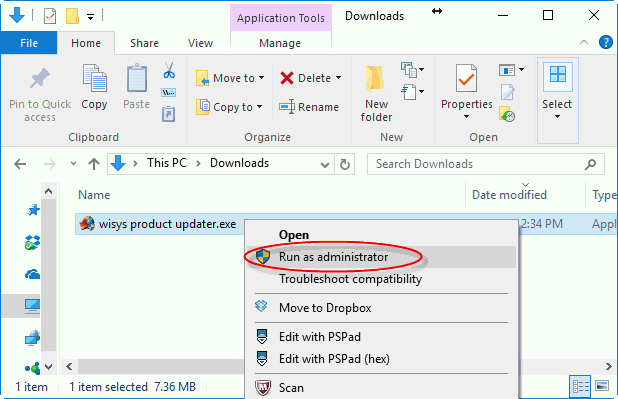
Figure 6: Begin Install Wizard- Click Next to continue
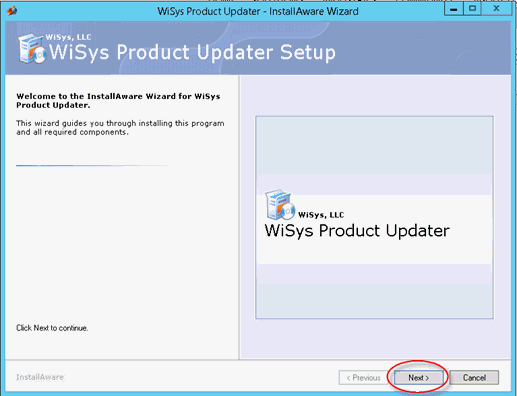
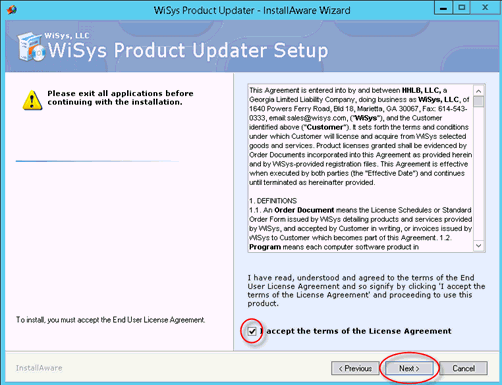
Figure 7: The License Agreement- Check the box to accept the license agreement and click Next
When installing the WiSys Product Updater keep the default install directory for your OS (Figure 8.)
· 32 bit systems: “C:\Program Files\WiSys\Product Updater\”
· 64 bit systems: “C:\Program Files(x86)\WiSys\Product Updater\”
Figure 8: Select Installation Folder- click Next
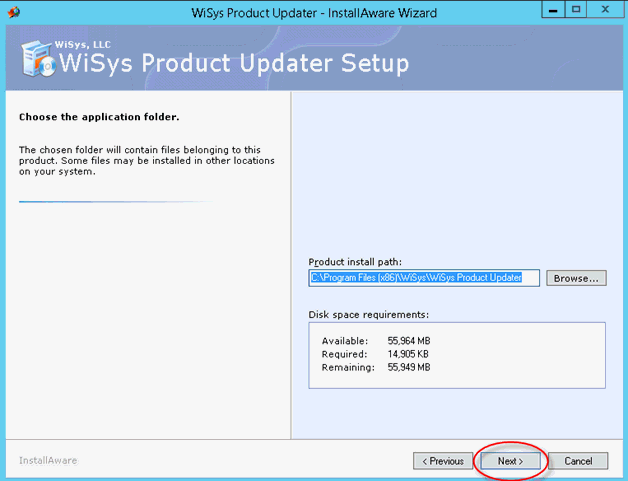
Figure 9: Choose the Start Menu Group - Select “Create Shortcuts for:” option and click Next to continue
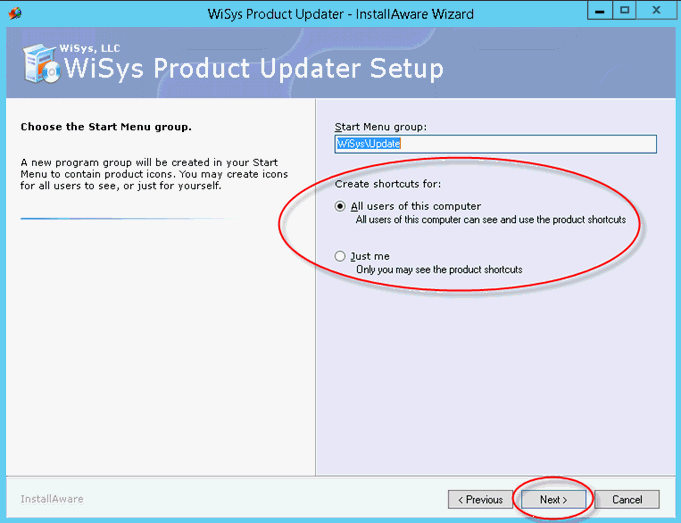
Figure 10: Confirming Installation -Click Next to begin installation.
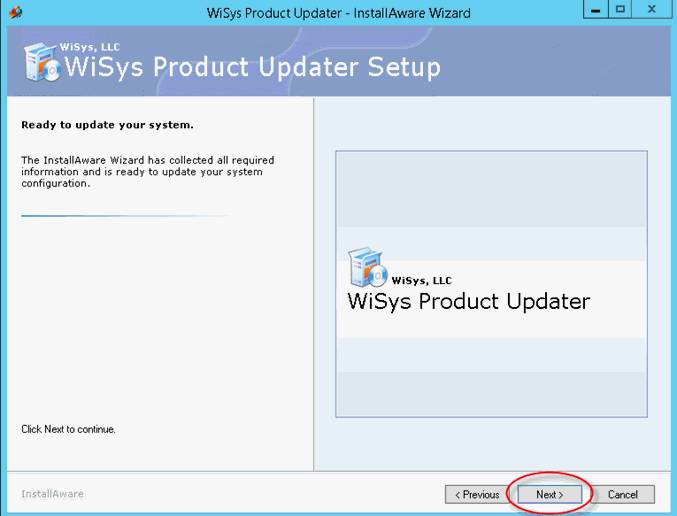
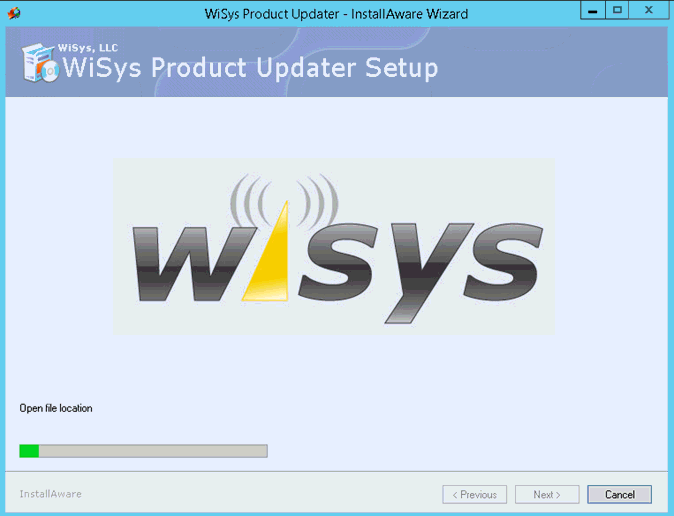
Figure 11: File Installation -Status of Product Updater Installation is shown in lower left of Screen.
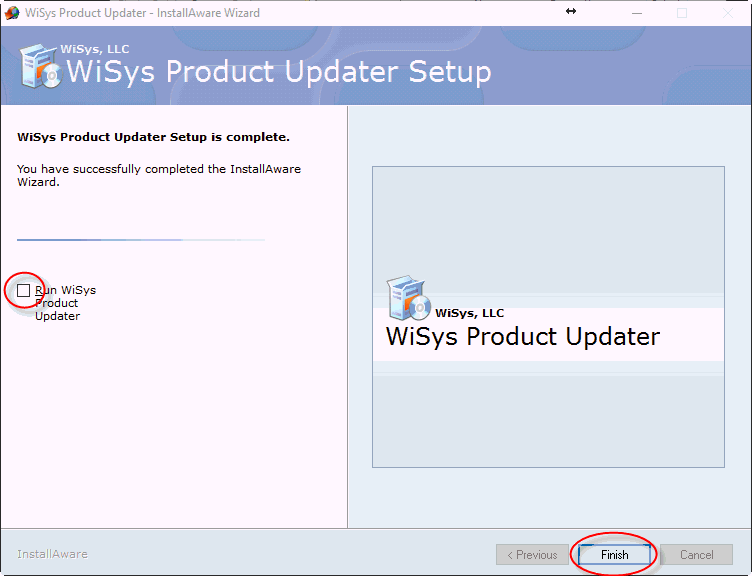
If you wish to run the Updater immediately, leave the checkbox checked and click Finish.
If you wish to run the Updater later or if Windows Server 2008\R2 or later (this enables the installation to be run as administrator in the next step.)
· Uncheck the box and click Finish
Figure 12: Running the Product Updater to install the WiSys applications
Before you begin installation of WiSys Applications
Note: User workstations must be updated using the Client Updater (Download) immediately following a WiSys Product Update. For more information on running the Client Updater please visit Workstation Client Updater
To begin installation of WiSys products:
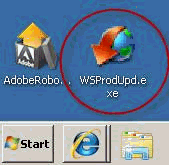
Locate the Product Updater icon on the desktop. You can also find this icon on your server in these locations
· 32bit OS – C:\Program Files\WiSys\WiSys Product Updater
· 64bit OS – C:\Program Files(x86)\WiSys\WiSys Product Updater
Note: You must be logged in as an Administrator with Domain Admin rights and Admin rights on the local computer to successfully execute the WiSys Product Updater. Windows 2008 and later, Right Click and Choose “Run as Administrator” or you will receive the “SeSecurityPrivilege” Error.
Figure 13: Product Updater Icon on Desktop
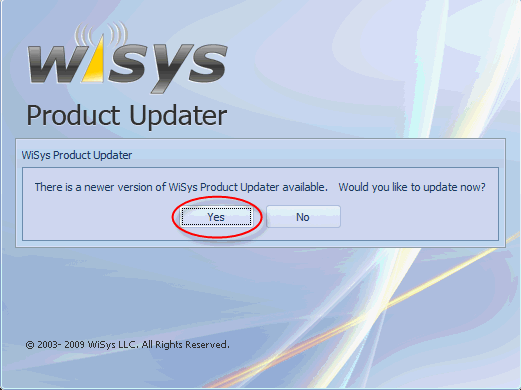
After launching you may receive the “Newer Version” message (Figure 14.) Click Yes to continue.
Figure 14: Launching the Updater
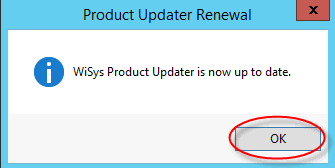
After the newest version is installed you will receive a message that the Product Updater is up to date. ClickOK.
Figure 15: Product Updater is up to date
NOTE: The Updater may ask you to renew itself a few times. Click Yes to renew each time until the Updater asks for SQL server credentials as in Figure 20 below.
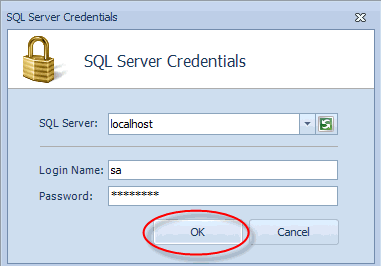
When the Updater launches you are presented with a SQL Server login dialogue (Figure 16.) Type in yourSQL Server, SA User name and SA Password in the appropriate fields and click OK.
You MUST have an SA Password to continue installation.
Note: WiSys does not support any SQL user other than SA as we cannot guarantee the integrity of the installation if this is not used.
Figure 16: SQL Server Login
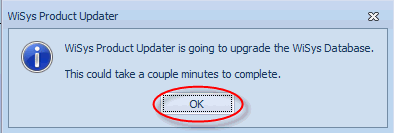
When updating to version 566 and later you may receive the “upgrade the WiSys Database” message, clickOK to acknowledge.
Figure 17: WiSys Database Create\Upgrade
After logging in to SQL Server the WiSys Product Updater will launch and ask for Company, Contract and Release (Figure 18.)
You must enter your Company, Contract, and Release exactly as they appear in the e-mail you received.
Also, if you are using Progression, you are required to fill in the Progression install directly (See Highlight Figure 18.) This step is not necessary for Macola ES users.
Click Update to continue
Note: During subsequent running of the Updater you will not have to enter the Company, Contract and Release information, the Updater will retain that information.
Figure 18: Product Updater Main Window with Company, Contract, and Release (example is from email at beginning of document.)
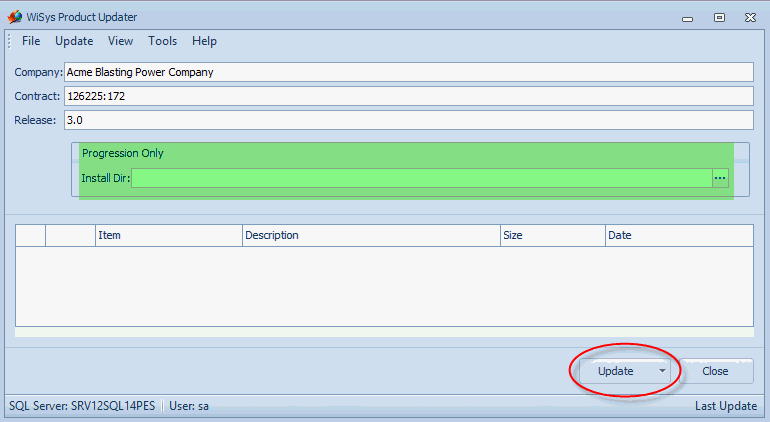
Figure 19: WiSys file retrieval – Click Yes
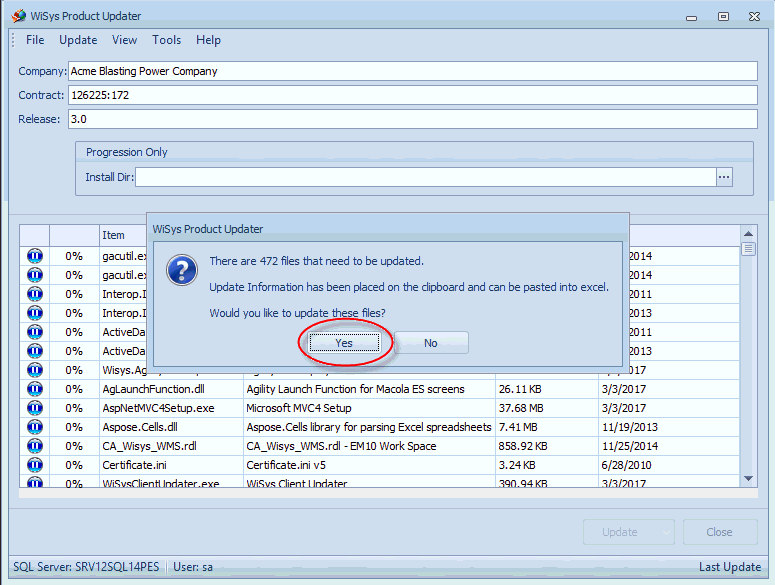
Figure 20: Runtime files will install if necessary, Click OK
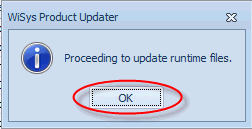
Figure 21: List of necessary Runtime files will display and begin to download and then install.
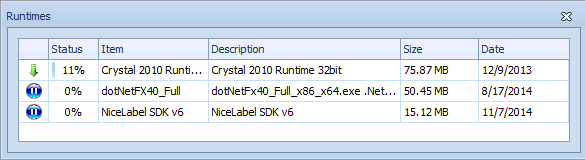
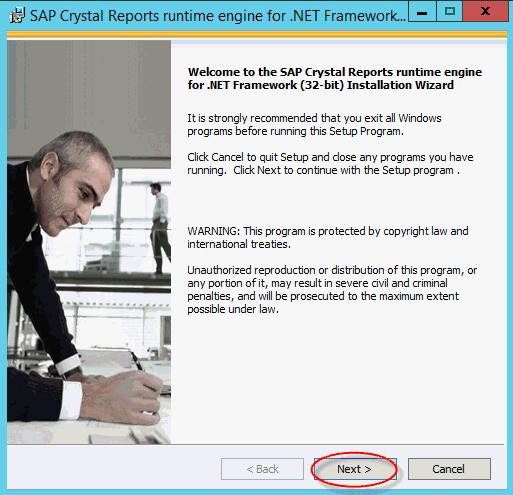
Figure 22: Crystal Install - Continue to click Next, Accept Terms, and Finish until Crystal Install is complete
If you already have .NET components installed you will receive this option (Figure 23), Click Close to continue. Otherwise continue to click Next, Accept Terms, and Finish until .NET install is complete (Figure 23)
Figure 23: .NET Install

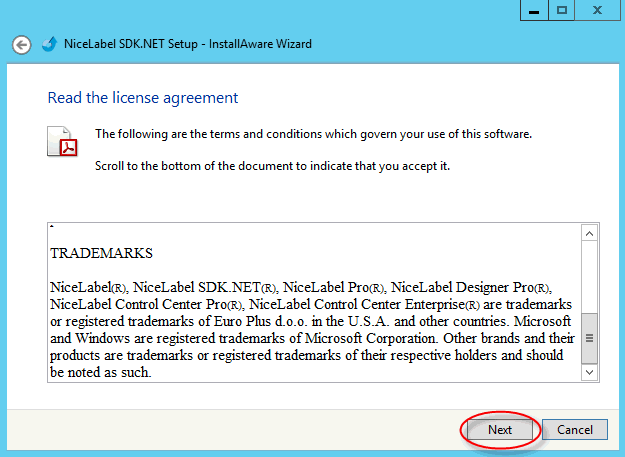
Continue to click Next, to Accept Terms you must scroll down using right scroll bar to enable Next button, and Finish until Nicelabel Install is complete (Figure 24.)
Figure 24: NiceLabel Install
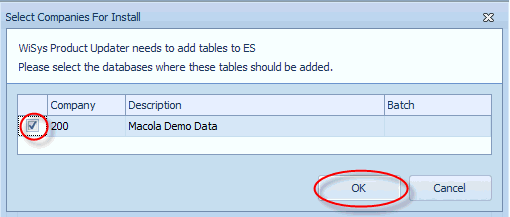
You must select at least one database. Check the box in the left column for those you wish to update. ClickOK to continue (Figure 25.)
Note: You will be able to choose databases each time you run the Updater. This allows you to update different databases at different times if needed (e.g. test vs production).
Figure 25: Choose Macola databases to install WiSys Database Components
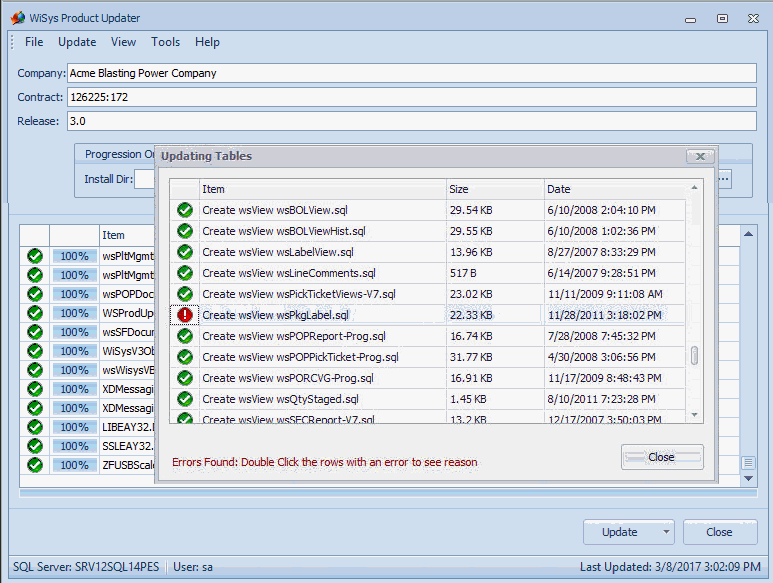
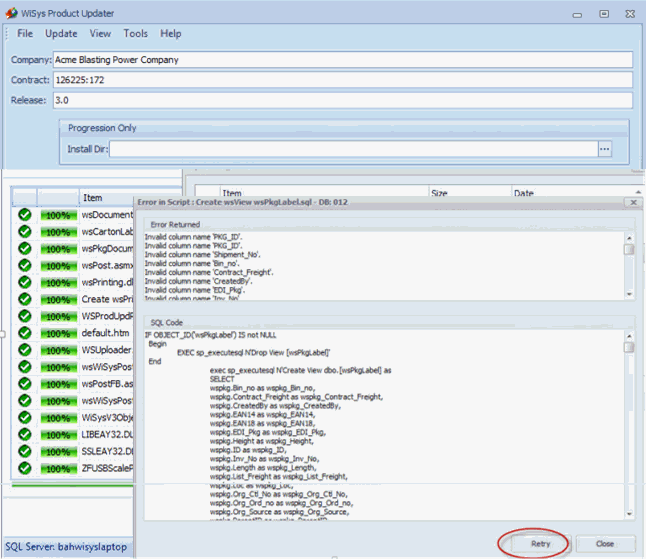
As each file finishes the row will indicate that it has been updated (Figure 26.) Occasionally you may get errors during the file and sql downloads and installations.
If you can, click Retry, if the file continues to error click Ignore and continue (The Updater will need to be run again when current process completes.)
Figure 26: The Updater now begins downloading and installing components.
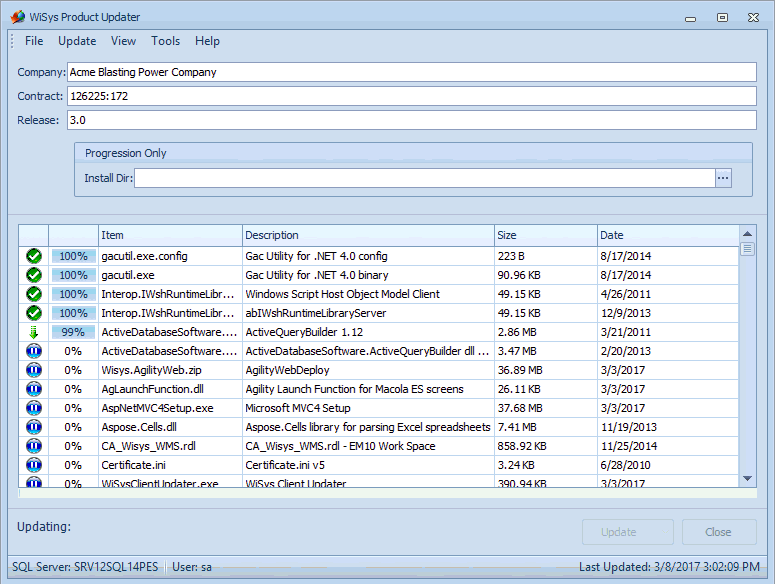
Figure 27: Successful Update of Files – Click OK.
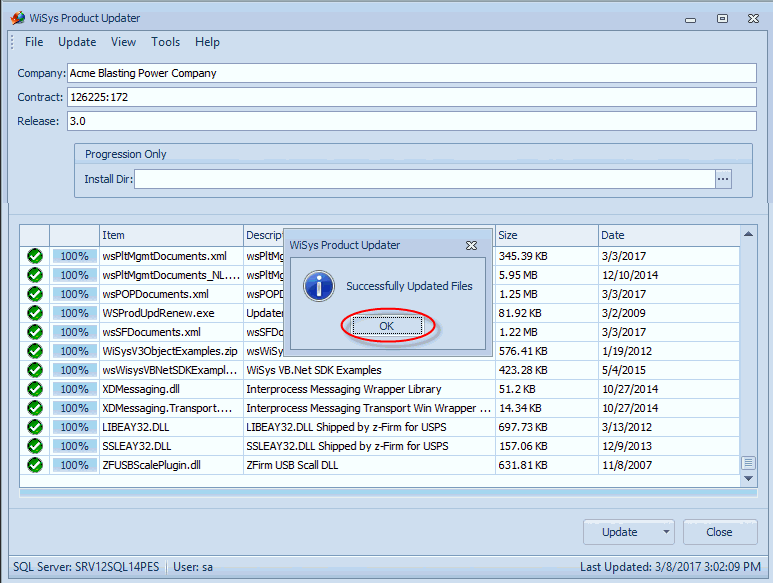
Figure 28: Reboot message – Click OK
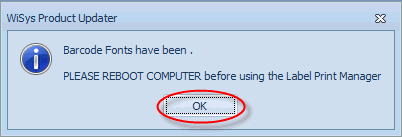
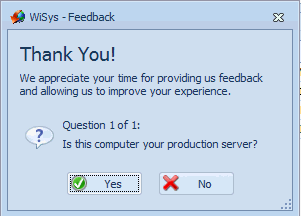
Figure 29: WiSys – Feedback - Please Click Yes if this was a production environment to help us know what Version you are on.
Important NOTES!
· If you have encountered any errors that were not resolved, please rerun the Product Updater to be certain all errors have cleared.
· User workstations must be updated using the Client Updater (Download) immediately following a WiSys Product Update.
o For more information on running the Client Updater please visit Workstation Client Updater
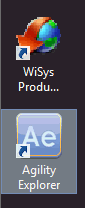
There should be one or more new Shortcuts on the desktop (Figure 30)
Figure 30: Desktop - Launching WiSys Applications
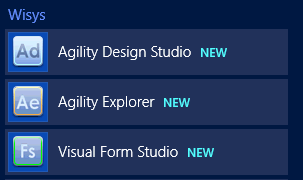
The other applications can be found by going to Start | Programs | WiSys (Figure 31 – Windows 10)
Figure 31: Start | Programs | WiSys
Server Installation complete!
Occasional Error Messages:
Error (Figure E1): While you are updating please temporarily disable…..
Solution:If this occurs while you are updating, temporarily disable the firewall, anti-virus, and VPN on the machine where you are performing the download, and rerun the Product Updater.
Figure E1: Disable firewall

Error (Figure E2): Error on the WiSys Server. The version you are updating requires you to update your Updater. Please update your WiSys Product Updater and try again. Please contact WiSys Support
Solution: Download latest Product Updater from WiSys Website and try again. Contact Support if you continue to have errors.
Figure E2:

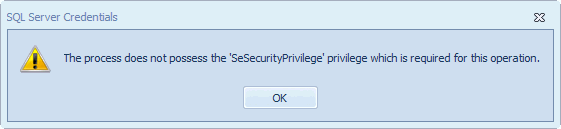
Error (Figure E3): The Process does not possess the ‘SeSecurityPrivilege’ privilege which is required for this operation.
Solution: Close and relaunch Product Updater by right clicking and selecting ‘Run as administrator’
Figure E3:
Error (Figure E4): CheckUpdateRenew – The underlying connection was closed: Could not establish trust relationship for the SSL/TLS secure channel.
Solution: Download latest Product Updater from WiSys Website and try again. Contact Support if you continue to have errors.
Figure E4:

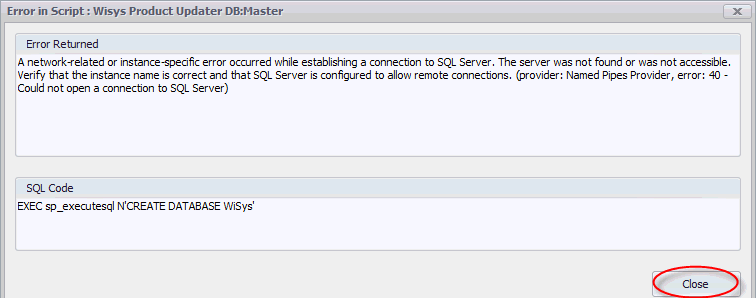
Error (Figure E5): Error In Script: WiSys Product Updater DB:Master
Solution: Click Close, Product Updater will close. Relaunch Product Updater and when prompted for SQL Login, use actual Server Name not Localhost. Contact Support if you continue to have errors.
Figure E5:
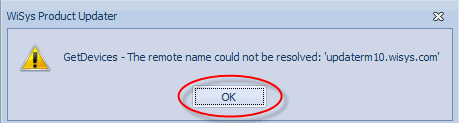
Error (Figure E6): GetDevices – The remote name could not be resolved: ‘updaterm10.wisys.com’
Solution: Click OK, recommend closing and relaunching Product Updater
Figure E6:
Error (Figure E7): File download errors
Solution: Follow screen directions – in example Double Click Row to open details screen (Figure E7.1)
Figure E7: File download errors
You may get a second screen that shows details of the error (Figure E7.1.) Click Retry
Figure E7.1: File download errors continued
If you have encountered any errors that were not resolved, please rerun the Product Updater to be certain all errors have cleared.