OE FILE IMPORT
OE File Import can be used to import data and create orders from three types of files: Comma Separated Values (.CSV), Text Files (.TXT) and Microsoft Excel Spreadsheets (.XLS). It is important to note that once a file type has been imported, that same file type must be used thereafter.
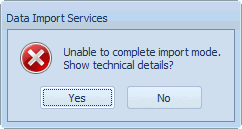
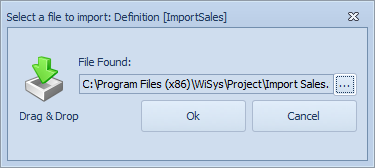
WiSys provides a sample Excel Order Import file with all installations. This file can be found in the following directory: c:\program files (x86)\wisys\project\Import Sales.xls for a 64 bit operating system and c:\program files\wisys\project\Import Sales.xls on a 32 bit Operating System. Our standard OE File Import grid is based on the structure (columns) in this worksheet. Adding, moving or deleting columns will cause the import to fail and throw error messages like the errors in Figure 1 below.
Figure 1: Import fail error
To use our "out of the box" OE File Import, your data import file must match the column layout of our sample file exactly. If you wish to create your own file import layout, please watch the Agility Design Studio Videos on how to create your own file import process grid located at Defining the File Import and Order Create Object Transaction
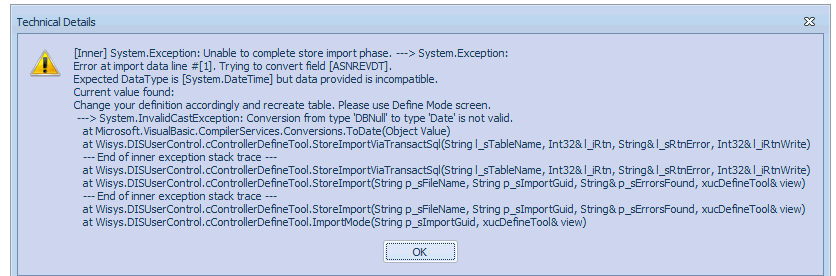
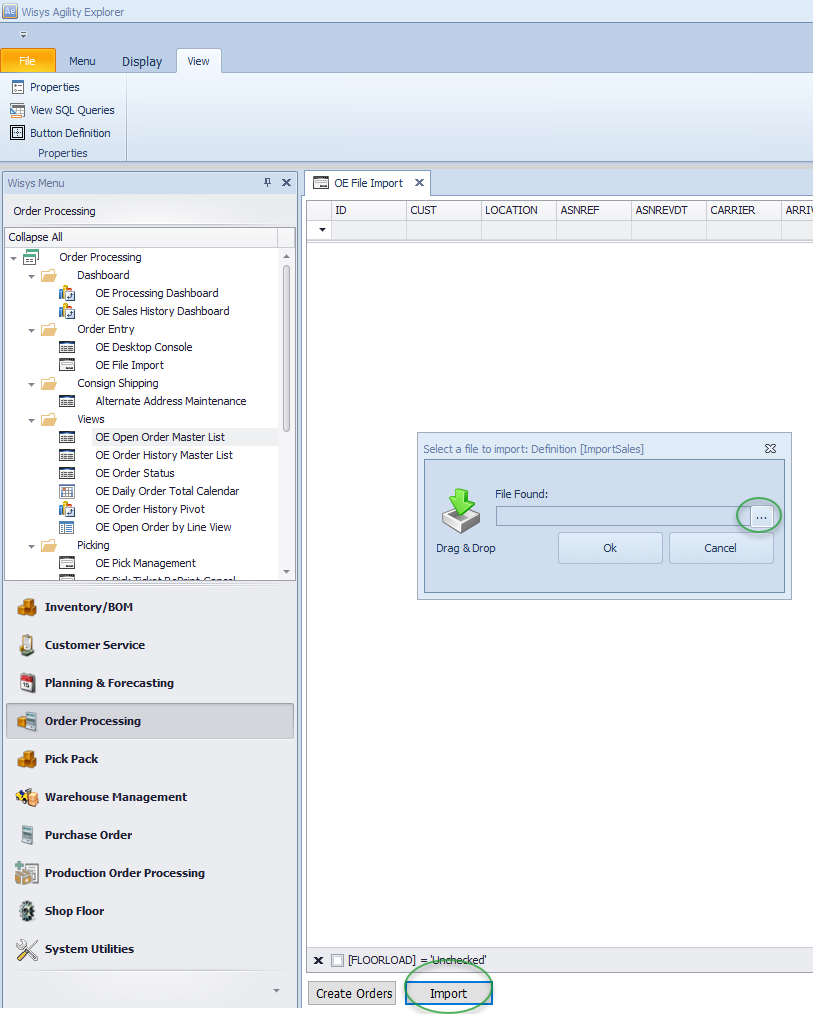
To proceed with our standard OE File Import Process Grid, create a data file with your order import data in the format of our sample. Once that is complete and saved, begin by Opening the OE File Import grid located at Agility Explorer, Order Processing, Order Entry and OE Order Import
Figure 2: Locating Order Import
When the grid is displayed, click the Import button and either drag and drop the file you created above to import or browse to it and select it from the folder it is saved in on your pc or network.
Figure 3: Importing the file
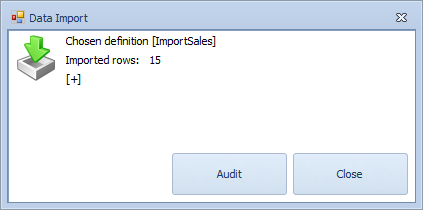
Click the OK button to import the data. Upon successful completion, you will see a screen like Figure 4 below indicating the number of rows / records imported. Click Close and you will see those records in the grid. If the import fails, you will see the error message referenced above in Figure 1.
Figure 4: Successful Import
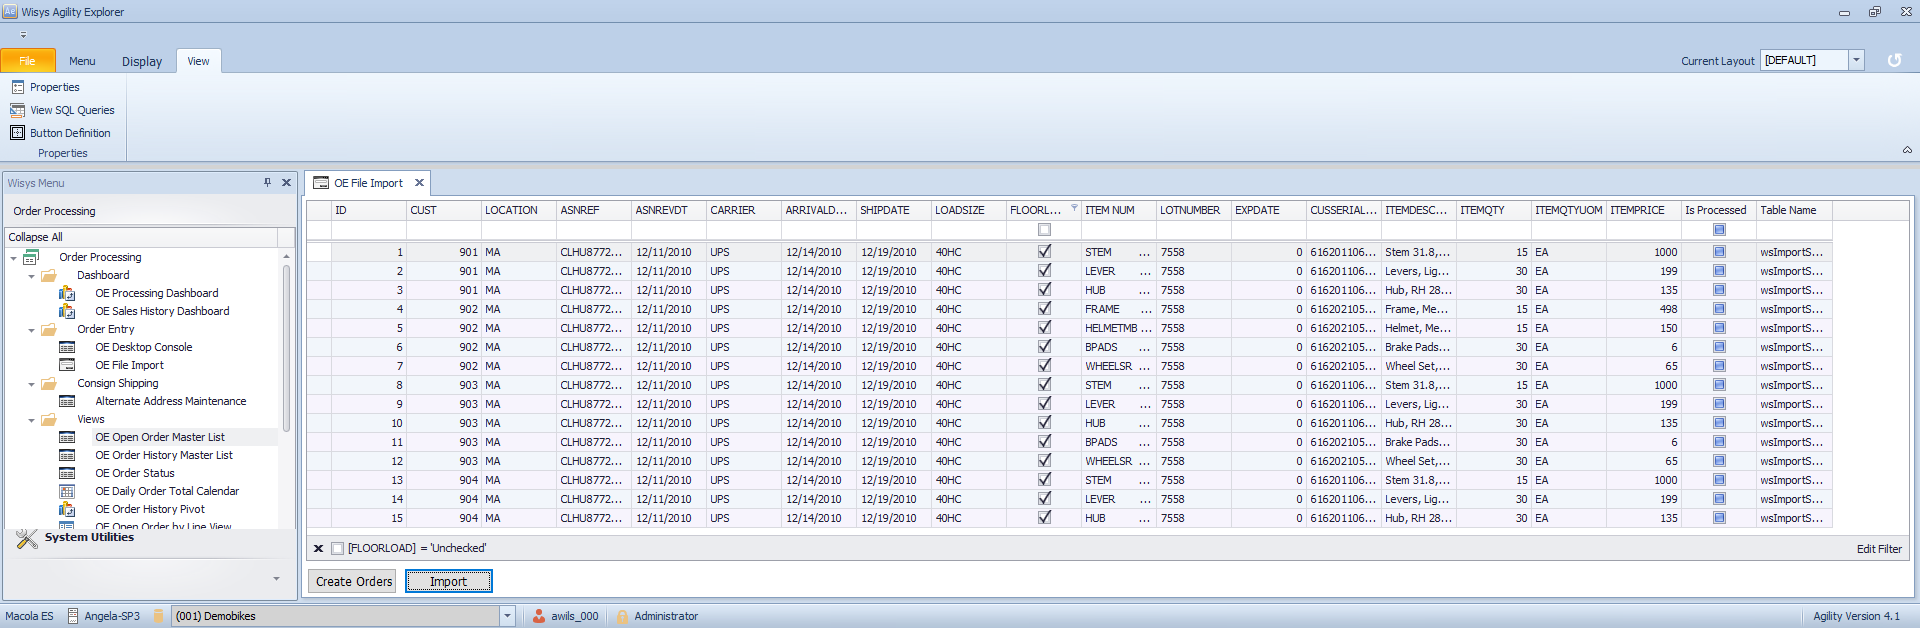
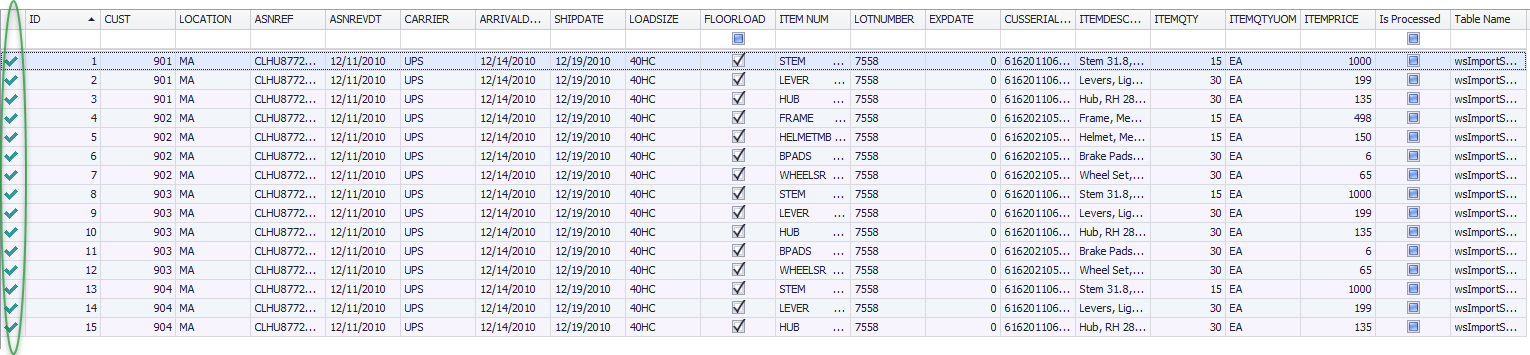
Next, to create orders in Macola from this data, click the Create Orders button. If the orders are created successfully, you will see a green check mark next to each row.
Figure 5: Successfully created orders
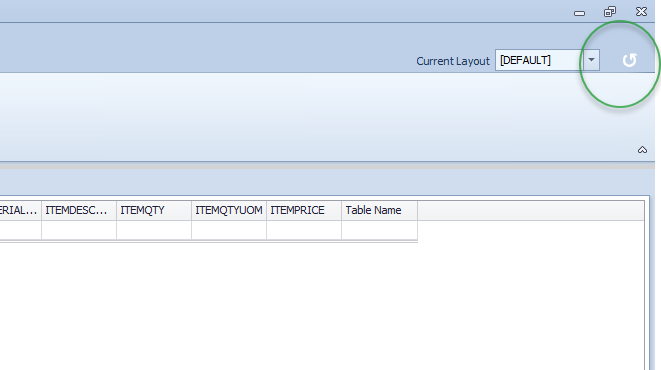
Click the Refresh button in the upper right corner of the screen to clear the imported orders from the screen.
Figure 6: Refreshing the screen