SERVER MIGRATION
When migrating Macola to a new server, there are several steps to install WiSys on the new server. After Macola has been moved to the new server, download and install the latest version of the WiSys Product Updater which can be found at WiSys Product Updater
Note: If upgrading your version of Macola, the msllockdb must also be backed up and restored to the new SQL Server after all users are out of the database and all locks released. If a restore is not possible and a new msllockdb is created, the following WiSys tables must be moved manually:
Devices
LicenseAttachments
WiSysConcurrency
WiSysLicense
wsCompaniesUpdater
wsHistUpdater
wsProductUpdater
wsUsersUpdater
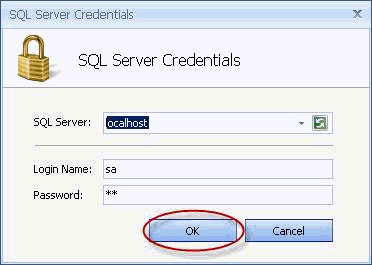
When the Updater launches you are presented with a SQL Server login dialogue. Browse for or key in the SQL server you wish to connect to in the box labeled ”SQL Server”. Use the SA Login Name and password where indicated and click ”OK”. Note: WiSys does not keep a record of customer SA User Names or Passwords.
Figure 1: SQL Server Credentials
For more information on running the WiSys Product Updater, please visit Installing WiSys Product Updater
After the update is complete, it is necessary to Update WiSys Security.
WiSys software uses SQL server authentication to connect and transact with your Macola Progression or ES databases. Upon running the WiSys Product Updater WiSys will automatically create a security login and database user called "WisysUser". This user will be created in all selected Macola databases. This will allow all WiSys application to communicate with your Macola databases without needing individual user level rights/ application level rights to your database server.
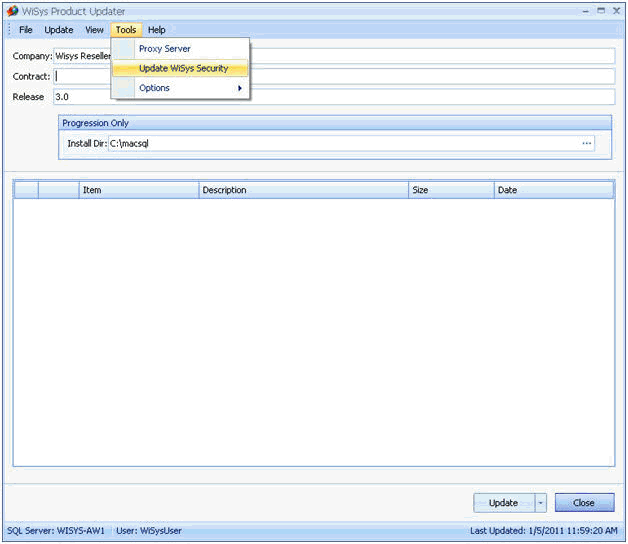
Open the WiSys Product Updater. Select Tools from the top tool bar, and Update WiSys Security.
Figure 2: Update WiSys Security
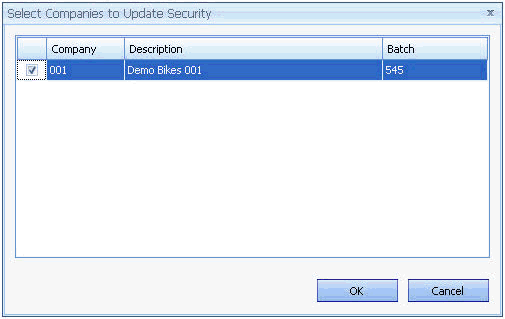
Select the companies to want to update and click "OK"
Figure 3: Selecting company
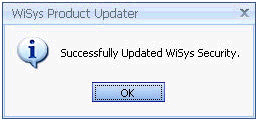
A message will appear to confirm the update.
Figure 4: Successful Update message
Next, download and run the current WiSys Client Updater on each client. The most recent version of the WiSys Client Updater can be found at WiSys Client Updater For more information on installing and running WiSys Client Updater please visit Workstation Client Updater
Finally, log into WMS Setup to ensure it is connecting properly to the new database.
Additional Considerations
If the SQL Server name was changed during the installation you will have to remove and then add companies on your new terminal server for Pocket ES Connect and Agility Explorer and Agility Designer. This step is not necessary if the SQL Server name remains the same.
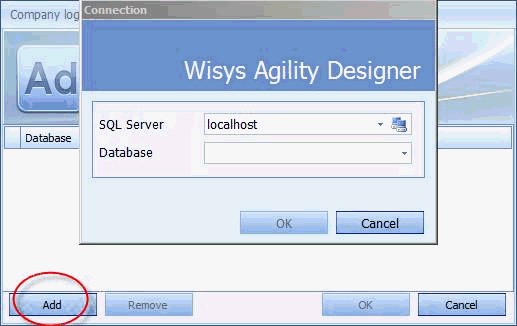
To add a company/database to Agility, click on the "Add" button to open the Connection Window to begin this process.
Figure 5: Adding a Database
Use the Drop Down arrow to locate the SQL server that your database(s) are stored on and then choose a database. To attach the database, click "OK". Continue to add databases as needed. You may attach as many databases as you need.
Figure 6: Agility Designer with Database 010 selected
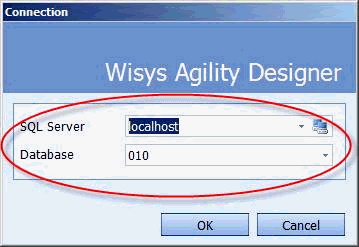
Figure 7: Agility Designer with three databases attached
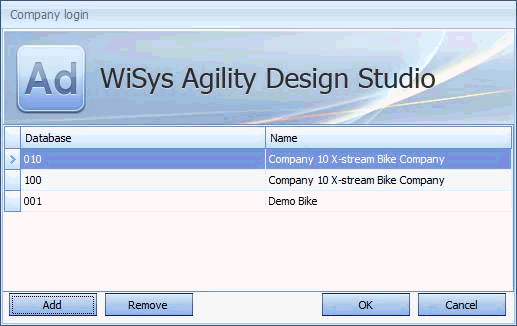
When you have finished attaching databases, choose one to begin and click the "OK" button to log in to that database.
To add a company/database to Agility Mobile (navigate to C:\Program Files\WiSys\Bin\PocketESConfiguration. Follow the steps above in Figures 5-7 to add the company.